skip to main |
skip to sidebar
Delicious Asian dinner in about half an hour
Source: Salu-salo
Taste: 5 (out of 5)
Difficulty: 1 (out of 5)
Ingredients:
- 1/2 lb ground turkey
- 1 tbsp soy sauce
- 1 1/2 lbs eggplant or Chinese eggplant 1 ½ lbs. Chinese eggplants, ends trimmed and cut on the diagonal into ½-inch slices
- 3 tbsp canola oil
- 8 garlic cloves, thinly sliced
- 2 tbsp cornstarch dissolved in 1 tbsp water
For the sauce:
- 1 cup chicken stock (or 1 cup of chicken flavored Better than Bullion dissolved in 1 cup of hot water)
- 1/4 cup hoisin sauce
- 3 tbsp soy sauce
- 2 tbsp balsamic vinegar
- 1 tsp of sambal oelek or sriracha (or up to 2 tbsp for a spicy version)
- 1 tsp sesame oil
Total: 6 servings
Directions:
1. Trim the eggplants and cut into 1/2 inch slices.
2. Combine the turkey with soy sauce and let stand for 10 minutes.
3. In another bowl, combine all sauce ingredients. Set aside.
4. Heat oil in a large skillet over high heat. Add garlic and cook for 10 to 15 seconds.
5. Add the turkey and cook for 2 minutes, stirring frequently.
6. Add the eggplants and the sauce and stir to mix well. Reduced the heat to medium, cover for about 10 minutes or until eggplants are tender.
7. Add cornstarch solution and cook, stirring until sauce thickens. Serve with steamed rice or cauliflower rice.
Afterthoughts:
This is a really delicious simple recipe and it works with any kind of meat: pork, beef, chicken, turkey. Might even work with ground tofu?! ;-)
To Recipe...
Summary only...
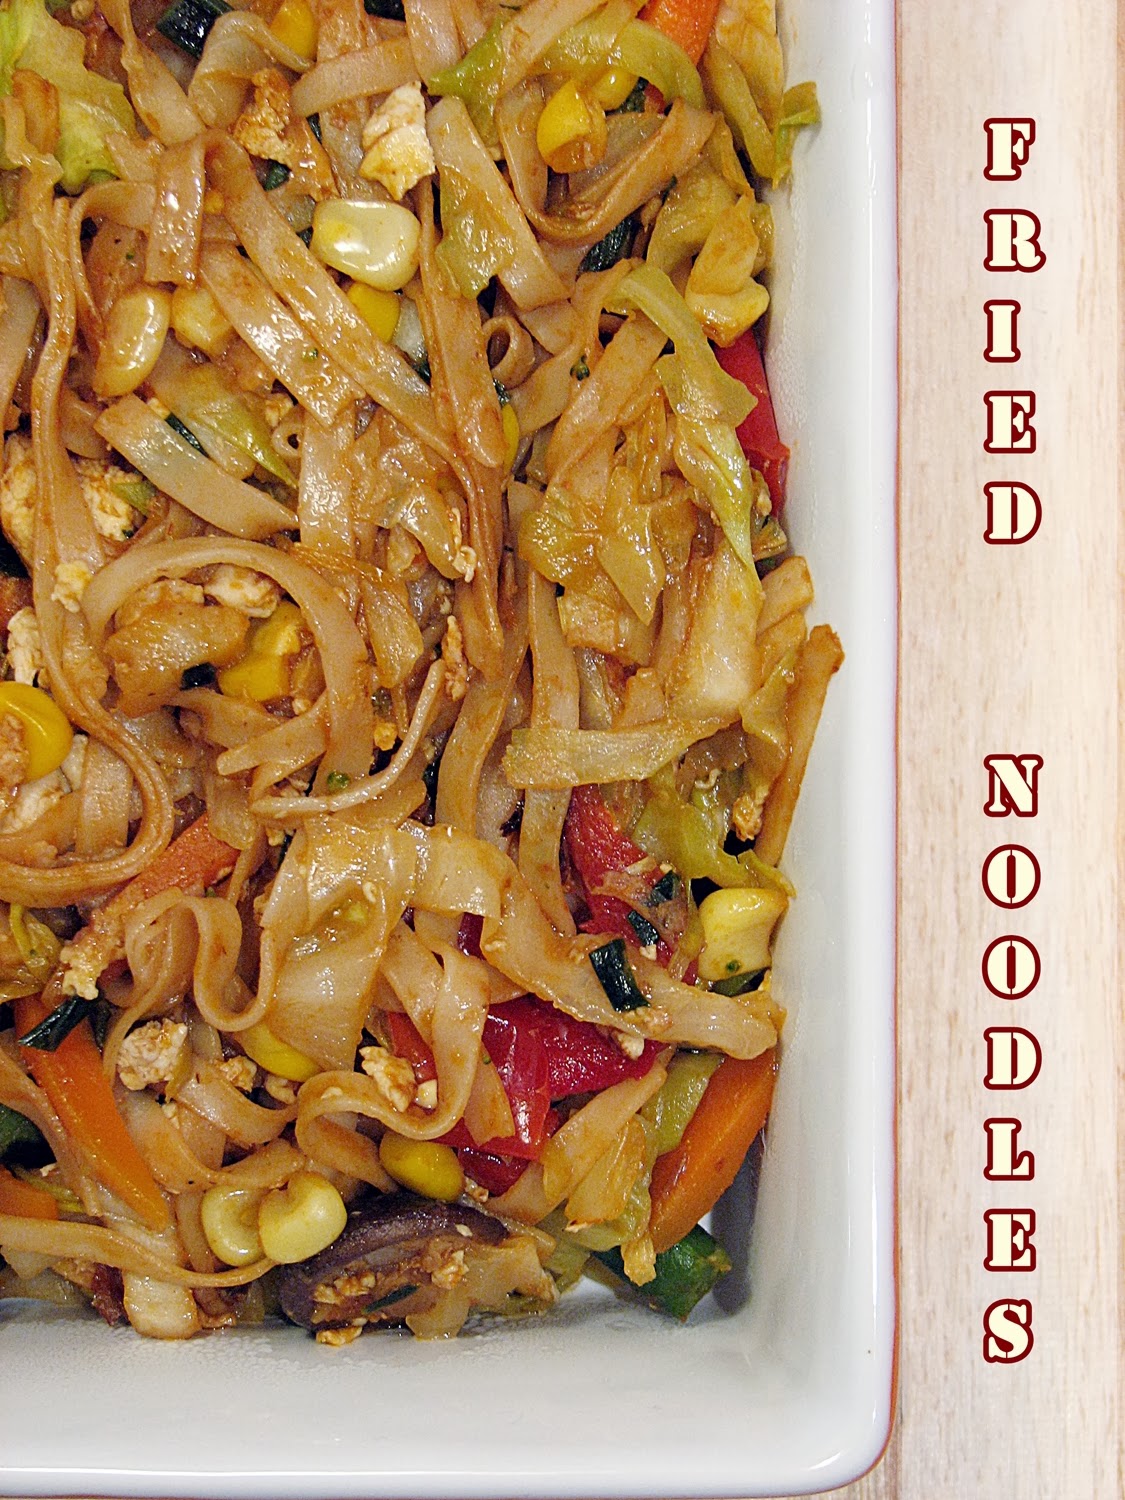
Super simple recipe for a quick week day dinner with exotic flavors
Source: Adopted from Rasa Malaysia blog
Taste: 5 (out of 5)
Difficulty: 1 (out of 5)
Ingredients:
- 2 cups of Asian noodles of your choice
- 2 tbsp canola oil
- 1 cup shredded cabbage
- 1 cup stir fry vegetable mix
- 1/2 cup corn kernels
- 2 tbsp sweet white wine
- 2 tbsp green onions or chives
For the sauce:
- 1 tbsp Sriracha
- 2 tbsp dark soy sauce
- 1 tbsp brown sugar
- 1/4 tsp salt
- 3 tbsp oyster sauce
- 3 tbsp katchup
- 1 tsp garlic powder
- 1 tbsp shrimp paste
Total: 3 servings (as main dish)
Directions:
1. In a medium sized pot bring 3 cups of water to boil, cook the noodles in boiling water for 1/2 - 1 minute, drain and set aside.
2. In a small bowl mix all the sauce ingredients and set aside
3. Preheat a large wok or frying pan over high heat. Add canola oil, let it warm up and add the eggs. Stir the eggs for 20-30 seconds until scrambled.
4. Add the noodles, vegetables, cabbage and corn and continue stirring for 3-5 minutes, until cooked.
5. Add the sauce and stir well until all the vegetables are coated.
6. Add the wine and the shallot, stir and serve.
Afterthoughts:
- This is a really simple and quick recipe, that takes 15-20 minutes from start to finish, and tastes delish.
- You can also add chicken or shrimp. The version here is almost vegetarian, as long as you don't mind the oyster sauce and the shrimp paste.
To Recipe...
Summary only...
Delicious falafel with a little twist
Source: Improvised based on this recipe from Epicurious
Taste: 5 (out of 5)
Difficulty: 3 (out of 5) - for scraping the food processor, rolling and refrigeration
Ingredients:
- 2 cups dried garbanzo beans / chickpeas
- 1 medium yellow onion
- 1/2 cup parsley
- 1 tbsp salt
- 1 tsp hot red pepper
- 8 garlic cloves
- 1 tbsp cumin
- 2 tsp baking powder
- 4 tbsp / 1/4 cup flour
- 4 tbsp / 1/4 cup peanut butter
Total: about 40 falafels
Directions:
1. In a large bowl, soak the dried chickpeas in cold / lukewarm water at room temperature overnight. The water level should be 1-2 inches above the chickpeas, and the bowl should be large enough to have room for the chickpeas to double in volume, as they absorb the water. Drain the chickpeas before continuing, but reserve a little liquid just in case your falafel mix turns out a bit dry.
2. Now you will need a food processor. If your food processor is large enough to accommodate all the ingredients, you can first process the chickpeas with the onion. You want to reach fine grainy consistency (like uncooked chia seeds), but not puree them (that would be hummus). You might want to pulse the food processor several times and scrape the sides of the bowl periodically to get uniform texture. Then add the rest of the ingredients and pulse more.
3. My processor is 9 cups, so I processed the chickpeas in 2 batches: half the chickpeas with all the flour and peanut butter. I processed this batch to an almost-paste consistency, In the second batch I processed the rest of the ingredients until they had a grainy texture. Then I combined the 2 batches and mixed in the baking powder at the very end.
4. Your "batter" should be still grainy but should be sticky enough to hold the shape when rolled into balls. Refrigerate the batter for 2-3 hours.
5. Shape the mix into small balls, approximately the size of a ping pong ball, and arrange on a parchment lined baking sheet. Refrigerate for 15 minutes. You can also freeze the falafels at this stage. Place them on a baking sheet in the freezer for 4 hours or more, and once they are completely frozen, remove them from the sheet into freezer bag and store until needed. If the frozen falafels stick to the baking sheet on which they were frozen, place the sheet on a towel soaked in hot water for several seconds, and it will release the falafels. To prepare the baked falafels, thaw them in the refrigerator overnight, and proceed to the next step.
6. Preheat the oven to 400F and bake the falafels for 10 minutes. Then turn on the broiler to high and broil for 3 more minutes.
7. Remove from the oven and serve with warm pita bread, pickles and tahina.
Afterthoughts:
- I tried several other falafel recipes, but they ended up too dry. Maybe this would not be a big obstacle for deep-fried falafels, because the hot oil would keep the batter together, but if you bake them, they simply fall apart. Hence the addition of the secret ingredient: the peanut butter! It is sticky and helps keep the mix together. And it adds a nice subtle flavor. In most circumstances I am not a fan of peanut butter, but I think that in this recipe it's a great addition.
- Don't over-bake your falafels. They will never look as brown and crisp as the deep fried ones. But that's ok. They will still taste moist and yummy, and since they go inside the pita, you won't really see them that much.
- If you are allergic to peanut butter, try another nut butter instead, like tahini (sesame seed butter), cashew butter, etc.
To Recipe...
Summary only...
Delicious, crumbly, soft and gooey - all that a pecan pie should be
Source: Adapted from allrecipes
Taste: 5 (out of 5)
Difficulty: 2 (out of 5)
Ingredients:
For the crust:
- 1 1/2 cups flour
- 1/4 cup sugar
- 1/4 tsp salt
- 1/2 cup margarine
For the filling:
- 2 eggs
- 1/2 cup corn syrup
- 1/2 unpacked brown sugar
- 1 1/2 tbsp margarine melted
- 1 tsp vanilla extract
- 1 1/4 cups chopped pecans
Total: 16 squares or 1 9 inch pie
Directions:
1. Grease a 9 inch pie pan or a 10x10 baking dish, if making the bars. Preheat oven to 350F.
2. Mix the flour, the sugar and the salt. Add cold margarine or butter and work it into the flour using Pastry Blender
3. Press the dough (with your hands or a small rolling pin) into the baking dish and bake for 20 minutes.
4. In the meantime prepare the filling. Melt the margarine and let cool slightly (it should be tepid, but still liquid).
5. Lightly mix the eggs with corn syrup and brown sugar until the sugar dissolves.
6. Add vanilla extract and margarine and mix well again.
7. Mix in the pecans.
8. When the crust is ready, pour the filling over it and continue cooking for another 35 minutes, until the filling solidifies.
9. Leave the bars in the pan on a wire rack to cool completely. It's better to refrigerate the pie overnight before removing from the pan and slicing.
Afterthoughts:
- The bars taste great, but I would still like to improve this recipe.
- The original recipe calls for more sugar and corn syrup for the filling. I find it to be too much as it is. I might reduce corn syrup to 1/4 or 1/3 cup next time.
- The eggs create a little foam in the filling. I tried to beat them as little as possible, but could not skip the beating completely because I had to dissolve the brown sugar. Maybe next time I should try mixing the sugar with the melted margarine, and once the lumps are dissolved, adding the eggs.
- There were some dryer and wetter patches on the crust. The crust dough was very flaky. Maybe next time I should use a bit more margarine for binding, and bake the crust for 25 minutes,
To Recipe...
Summary only...
Simple 3 ingredient juice that can be made in any blender if you are using seedless grapes
Source: improvised
Taste: 5 (out of 5)
Difficulty: 1 (out of 5)
Ingredients:
- 3/4 lb / 300 g honey dew melon peeled and cubed
- 3/4 lb / 300 g watermelon peeled and cubed
- 3/4 lb / 300 g red grapes
- 6 ice cubes
Total: 4 servings
Directions:
Place all ingredients in your Vitamix, process for 30 seconds on speed 5, using the tamper to push the fruit down. When there are no large fruit chunks left, set the blender to high and process for about 1 minute for grapes with seeds, or for 30 seconds for seedless grapes.
Afterthoughts:
- Very sweet and refreshing juice, only raw fruits and vitamins, what can be better?
- If you are using seedless grapes, any blender can do. But using Vitamix
will completely crash the seeds and get you all those vitamins hidden in them (or so their sales people say).
Love my Vitamix :-)
To Recipe...
Summary only...
Amazingly delicious, perfect fall comfort food, vegetarian and can be vegan too, but will satisfy any carnivore
Source: my mom
Taste: 5 (out of 5)
Difficulty: 2 (out of 5)
Ingredients:
- 1 lb chanterelle mushrooms
- 1 large yellow onion
- 4 cloves garlic
- 6 medium russet potatoes
- 2 tbsp canola oil (or use another vegetable oil)
- 2 tbsp butter (use vegetable oil for vegan version)
- 1 tbsp cognac or rum
- 1 cup vegetable or beef stock (or 1 tsp Better than Bullion paste dissolved in 1 cup of hot water)
- 3-4 bay leaves
- 1/4 tsp ground black pepper
- 1/2 tsp kosher salt
Total: 4 servings
Directions:
1. Clean the chanterelles. You are supposed to clean the mushrooms with a paper towel or a brush, and not wash them, so that they don't absorb moisture, but I do wash them, especially wild mushrooms like chantelles.
2. Roughly chop the onion.
3. Preheat a Dutch oven or a large pot over medium heat, warm up the oil and add the butter, if using. When the oil warms up and the butter melts, add the onions and sautee for about 10 minutes until translucent, stirring occasionally.
4. Peel and chop the garlic and add to the onions. Sautee for another 2 minutes.
5. Add the mushrooms, the cognac, the bay leaves, the pepper and the salt. Let cook for about 20 minutes, stirring every 5 minutes or so.
6. Peel the potatoes, chop them into 1 inch cubes and add to the mushrooms. Add the stock, stir the ingredients, increase the heat to medium high and bring to simmer.
7. Reduce the heat to slightly below medium, cover and let cook for another 20 minutes. Gently stir once or twice during this time, try not to mash the potatoes (the stew will still be delicious, but it will look even more rustic).
8. Total cooking time would be about 1 hour. When the potatoes are cooked, your stew is ready. Serve with crusty bread and salad.
Afterthoughts:
- This is simply the best imaginable dinner on a cold autumn night.
- This stew would work with other mushrooms as well. Champignons and portabellas will do for sure, with exactly the same directions. For other wild mushrooms one might need to adjust the cooking times.
To Recipe...
Summary only...
Yummy, simple and great for any occasion
Source: Japanese Potato Salad from Nami's Just One Cookbook
Taste: 5 (out of 5)
Difficulty: 2 (out of 5)
Ingredients:
- 2 Russet potatoes
- 1/2 tsp salt
- 1 egg
- 2 1/2 inch carrot
- 1/4 cup corn kernels
- 2 inch English cucumbers
- 2 slices of ham or bologna
- 1/3 cup mayonnaise
- 2 sprigs of parsley
- salt
- black pepper
Total: 8 servings
Directions:
1. Peel potatoes and cut into 1 inch cubes. Boil them on high heat, and after the water boils, let cook for another 10-15 minutes until done. Drain the water and mash the potatoes but leave some small chunks for texture. Sprinkle with salt and transfer into a big bowl.
2. In the meantime prepare a boiled egg. Peel and mash the egg with a fork in a small bowl.
3. Cut carrots into 1/8 inch cubes, put them in a microwave-safe container and cover with water. Microwave for 30 seconds on high and drain.
4. Cut the cucumbers and the bologna or the ham into 1/8 inch cubes.
5. If using canned corn kernels, drain them. If using frozen, place into a small microwave bowl, add 2 tablespoons of water and microwave on high for 1 minute. Drain the water.
6. Roughly chop the parsley.
7. Add all the ingredients into the mashed potatoes. Sprinkle with salt and pepper and mix well. Add mayonnaise and mix until incorporated.
8. Refrigerate until ready to serve. Will keep in refrigerator for 2 days.
Afterthoughts:
- This is a pretty simple potato salad, mashing the potatoes, as opposed to slicing them, saves some time.
- You can also add pickled cucumber, green onions or green peas, depending on your preferences.
- Check out Nami's blog for step by step photos, and add Japanese mayo to make this salad Japanese :-).
To Recipe...
Summary only...
A slice of delicious moist cake for only 135 calories!
Source: Mom on Timeout
Taste: 5 (out of 5)
Difficulty: 1 (out of 5), if the carrots are already shredded
Ingredients:
- 1 1/4 cup unsweetened applesauce (130 cal)
- 1 1/2 cup white sugar (1160 cal)
- 3 eggs (210 cal)
- 2 cups all-purpose flour (870 cal)
- 1 tsp baking soda mixed with 1 tbsp lemon juice or apple vinegar to activate
- 1 1/2 tsp baking powder
- 1/2 tsp salt
- 3 cups grated carrots (135 cal)
- 1 tsp vanilla (10 cal)
- 1 cup Dole pineapple in juice, crushed, not drained (160 cal)
Total: 9x13 inch cake, 20 servings, 2675 cal, 135 cal / serving
Directions:
1. Lightly grease a 9x13 inch baking sheet.
2. Combine all ingredients in a large bowl and mix (you don't really need a mixer for this batter, a whisk is enough)
3. Pour the ingredients into a lightly greased 9x13 inch baking sheet and cook in oven preheated to 350F for about 40 minutes, until the cake is golden and a toothpick tester comes out clean. (In my oven it always takes much longer, I baked on 375F for 70 minutes.)
4. Let cool on a rack, slice and serve.
Afterthoughts:
- Only when I started mixing all the ingredients I noticed that there is no butter or oil in the recipe. I was skeptical if it would turn out ok, but it was too late to look for another recipe, so I continued, and the cake turned out really delicious. I would not be able to guess that it's completely fat free (well, of course there is fat in eggs, etc.)
- I completely skipped the frosting from the original recipe. I also skipped the nuts, added more carrots instead, skipped the cinnamon (it's not the cinnamon's fault, it's me), and reduced the sugar. The cake still turned out sweet and delicious.
To Recipe...
Summary only...
Lighter and faster version without deep frying and using a ready made sauce.
Source: A combination of Martha Stewart's and Heather's recipes
Taste: 4 (out of 5)
Difficulty: 2 (out of 5)
Ingredients:
- 1 lb skinless boneless chicken breasts or thighs, cut into 1 inch pieces
- 3 tbsp cornstarch
- 2 egg whites
- 1/2 tsp salt
- 1/4 tsp black pepper
- 1/2 lb green beans
- 1/2 cup Trader Joe's Genereal Tso's Sauce
- 2 tbsp canola oil for cooking
Directions:
1. In a medium sized bowl whisk together egg whites, cornstarch, salt and pepper. Add chicken, and toss to coat. Refrigerate from 15 minutes to several hours to marinate the chicken.
2. Heat a 2 tbsp of oil in a large non stick skillet over medium-high heat. Transfer chicken pieces into the skillet, shaking off the egg white batter. Cook for about 10 minutes until golden, stirring occasionally. If there is too much chicken to fit in 1 layer on the pan, you can do the frying in 2 batches.
3. When the chicken is cooked, remove it to a plate.
4. Pour the green beans and the sauce onto the skillet and cook stirring for 4-5 mintues, until the beans are soft and the sauce thick. Add the chicken to the pan and stir to coat it with the sauce.
5. Serve over white rice (or cauliflower rice).
Afterthoughts:
The taste is good, but the lighter version does not give you the deep frying crunch that I did not really expect, but was secretly hoping for. Oh, well... And maybe I would add 2 more tablespoons of sauce next time.
To Recipe...
Summary only...
Quick, easy, healthy, vegan, gluten free, low cal, filling and even pretty tasty :-)
Source: Many blogs for example Everyday Maven has nice step-by-step pictures
Taste: 5 (out of 5)
Difficulty: 2 (out of 5), and not 1 because I am too lazy to chop cauliflower in batches

Ingredients:
- 1 medium sized cauliflower (140 cal)
- 1/2 tbsp olive or canola oil (60 cal)
- pepper and salt (optional)
Total: 200 cal, 4 servings, 50 cal/serving
Directions:
1. Wash cauliflower, cut it, discard the core and break of the florettes until you have pieces of approximately the same size.
2. Place the florettes in a food porcessor in 1 layer, do not overcrowd the food processor. In my food processor I have to shred a medium sized cauliflower in 3-4 batches.
3. Process until you get "rice" consistency. In my case I let the food processor run on high for 10 seconds and then pulse for 2 seconds 5 times.
4. At this stage you freeze a batch of your cauliflower rice in a zip lock bag for future use. You could then defrost the batch for 15-30 minutes and cook as usual. It turns a little mushier than freshly cooked, but pretty similar.
5. In a large non-stick frying pan heat 1/2 tbsp of oil over medium-high heat, add the cauliflower and cook for 5-10 minutes, stirring occasionally.
6. You can also add salt and pepper or other spices (turmeric, cumin, etc) while cooking. Or don't add anything if you want plained steamed rice.
Afterthoughts:
This is a really nice trick to make your meal healthier and eat waaaay less calories. In one cup of white rice there are 200 calories, in one cup of cauliflower rice there are 50: you save 75% of calories! And taste / texture - wise it works pretty well as a substitute for the "real" thing. Especially if you make fried rice, you might never notice the difference.
To Recipe...
Summary only...




 Posts
Posts

