AdSense Full Screen test

Showing posts with label Health. Show all posts

Thursday, July 2, 2020

Salted Cabbage (Sauerkraut)

Cabbage, salt and water - super healthy and tasty
Taste: 5 (out of 5)
Difficulty: 2 (out of 5)
Source: Trial and error

Ingredients:

- 1 small-medium green cabbage (3-4 lbs)
- 2 tbsp salt
- 2 litres of boiled water cooled to room temperature

Directions:
1. Wash the cabbage, the hands, a 4l (1 gallon) glass jar and a large bowl.
2. Finely shred the cabbage (in a food processor or by hand)
3. In a large bawl, add salt to shredded cabbage and mix with your hands, gently squeezing the cabbage. It should soften, but not get too runny.
4. Transfer the cabbage into the glass jar, and add chilled boiled water, just enough to cover the cabbage. You will probably need much less than 2 litres.
5. Loosely cover the jar with the lid, but don't tighten it, you need air flow in the jar.
6. Leave the jar outside at room temperature.
7. Every day, open the jar, use a wooden spatula with a long handle to poke wholes in the cabbage to let the gasses from the bottom escape. Press the cabbage so that it stays submerged under the water and loosely cover with the lid again.
8. Taste your sauerkraut every day, until it reaches the level of doneness that you like. In my case it took 2 days, but it would depend on the temperature in your house.
9. Once the sauerkraut is ready, tighten the lid and keep it in the fridge.

Afterthoughts:
Many recipes use vinegar, oil, sugar or other spices. I think with salt alone it turns out the best, not only calorie and health-wise, but primarily taste-wise.

To Recipe...

Saturday, August 24, 2019

Salted Cucumber Pickles (NO Vinegar)

If you don't like the taste of vinegar in your pickles 
Taste: 4 (out of 5)
Difficulty: 1 (out of 5)
Source: trial and error

Ingredients:
- 1 kg / 2 lbs of cucumbers
- 1 liter / 4 cups of boiling water
- 2 tbsp salt
- 1 tbsp dill flakes
- 1 tbsp whole mustard seeds or 1/2 tbsp mustard powder
- 2 garlic cloves, thinly sliced or 1/2 tbsp garlic powder
- a dash of cayenne
- 4-5 bay leaves

Instructions:
1. Leave cucumbers in cold water for 1-2 hours (this is supposed to keep them crispy).
2. Boil 1 liter of water and mix in all spices except bay leaves. While cucumbers are soaked in cold water, let the boiled water with spices cool down.
3. Cut off the tips of the cucumbers. Place cucumbers in a 2 liter / half gallon glass jar and pour the chilled water with spices over them so that all cucumbers are covered. Place bay leaves on top.
4. Loosely cover the jar with the lid and Let ferment for 1 to 3 days at room temperature. Taste the cucumbers at the end of each day. The longer they stay out the saltier they become. For me one day is usually enough.
5. When the cucumbers reach desired degree of saltiness, close the lid and refrigerate. They will keep in the fridge for months.

To Recipe...

Friday, December 13, 2013

Good morning detox drink

A drink that keeps the cold away 
Source: My mom told me it's good for you

Taste: 1 (out of 5) - you're drinking it for health benefits
Difficulty: 1 (out of 5)

Source:
- 1/2 gallon / 2 liters water
- 3 inches fresh ginger ground, or 3 frozen ginger cubes
- 1 lemon or lime cut in half
Total: 16 servings of 1/2 cup

Directions:
1. Add all ingredients to a large pot, bring to boil, remove from heat and allow to cool. Pour into clean jars and refrigerate.
2. Warm up (e.g. in a microwave) 1/2 cup and drink first thing in the morning before eating anything else.

Afterthoughts:
I really don't like the taste, but I believe this drink is great for preventing colds, and generally strengthening the immune system and cleansing the body. I tried something similar with horseradish several years back, and it kept me healthy all winter. As much as I don't like this ginger drink it tastes much better than the horseradish. I'll wait and see if it's as effective.

To Recipe...

Friday, December 6, 2013

Freezer Ginger Squares

Ready, peeled, ground and portioned ginger whenever you need it
Source: improvised


Taste: Not applicable
Difficulty: 1 (out of 5)

Ingredients:
Ginger root, as much as you want

Directions:
1. Wash and peel the ginger root, and cut into 1/2 inch slices.
2. Place the ginger into your Vitamix (or another very strong) blender. Start on low setting, increase speed from 0 to 5, use the tamper if large chunks of ginger get stuck. When the mixture is more or less uniform, increase the speed to 10, then set it to High and let process for another 15 seconds.
3. Line a small shallow freezer-safe dish (I use a plastic cover of a Pyrex) with parchment paper, and scoop out the ground ginger onto the dish. Flatten the ginger puree with a spatula, and freeze for about 2 hours.
4. Remove the ginger from the freezer, flip the ginger onto a cutting board, peel off the paper, and cut the ginger into squares. Place the squares into a freezer bag and freezer until required.

Afterthoughts:
I love this method and use it with lots of herbs and spices: lemongrass, roasted garlic, parsley, basil, you name it. It is particularly great for highly perishable herbs. For ginger, it saves you a lot of time: you do all the peeling, the grinding and the washing once every couple of months, and have freshly ground ginger whenever you need it in a second.


To Recipe...

Wednesday, October 23, 2013

Melon Grape Juice in Vitamix

Simple 3 ingredient juice that can be made in any blender if you are using seedless grapes 
Source: improvised

Taste: 5 (out of 5)
Difficulty: 1 (out of 5)

Ingredients:
- 3/4 lb / 300 g honey dew melon peeled and cubed
- 3/4 lb / 300 g watermelon peeled and cubed
- 3/4 lb / 300 g red grapes
- 6 ice cubes
Total: 4 servings

Directions:
Place all ingredients in your Vitamix, process for 30 seconds on speed 5, using the tamper to push the fruit down. When there are no large fruit chunks left, set the blender to high and process for about 1 minute for grapes with seeds, or for 30 seconds for seedless grapes.

Afterthoughts:
- Very sweet and refreshing juice, only raw fruits and vitamins, what can be better?
- If you are using seedless grapes, any blender can do. But using Vitamix
will completely crash the seeds and get you all those vitamins hidden in them (or so their sales people say).

Love my Vitamix :-)

To Recipe...

Thursday, September 5, 2013

Cauliflower "Rice"

Cauliflower rice
Quick, easy, healthy, vegan, gluten free, low cal, filling and even pretty tasty :-)
Source: Many blogs for example Everyday Maven has nice step-by-step pictures

Taste: 5 (out of 5)
Difficulty: 2 (out of 5), and not 1 because I am too lazy to chop cauliflower in batches
Cauliflower rice
Ingredients:
- 1 medium sized cauliflower (140 cal)
- 1/2 tbsp olive or canola oil (60 cal)
- pepper and salt (optional)
Total: 200 cal, 4 servings, 50 cal/serving

Directions:
1. Wash cauliflower, cut it, discard the core and break of the florettes until you have pieces of approximately the same size.
2. Place the florettes in a food porcessor in 1 layer, do not overcrowd the food processor. In my food processor I have to shred a medium sized cauliflower in 3-4 batches.
3. Process until you get "rice" consistency. In my case I let the food processor run on high for 10 seconds and then pulse for 2 seconds 5 times.
4. At this stage you freeze a batch of your cauliflower rice in a zip lock bag for future use. You could then defrost the batch for 15-30 minutes and cook as usual. It turns a little mushier than freshly cooked, but pretty similar.
5. In a large non-stick frying pan heat 1/2 tbsp of oil over medium-high heat, add the cauliflower and cook for 5-10 minutes, stirring occasionally.
6. You can also add salt and pepper or other spices (turmeric, cumin, etc) while cooking. Or don't add anything if you want plained steamed rice.

Afterthoughts:
This is a really nice trick to make your meal healthier and eat waaaay less calories. In one cup of white rice there are 200 calories, in one cup of cauliflower rice there are 50: you save 75% of calories! And taste / texture - wise it works pretty well as a substitute for the "real" thing. Especially if you make fried rice, you might never notice the difference.

To Recipe...

Sunday, February 24, 2013

How to Make Roasted Garlic Cubes

Freeze a batch of home made roasted garlic cubes, and they are ready to use whenever you need them.
Source: Improvised

Taste: 5 (out of 5) - for those who love roasted garlic
Difficulty: 3 (out of 5) - mainly time consuming

Ingredients:
1 lb whole garlic heads (or as many as you want)

Directions:
1. Preheat the oven to 400F. Line a baking sheet with a piece of aluminum foil, and place the garlic heads on the foil. The aluminum foil should be large enough to wrap around the garlic.
2. Cut the tops of the garlic heads (about 1/4 of the head), but keep the cut piece. Drizzle olive oil over the lower part of each head and cover with the upper part.
3. Wrap the aluminum foil so that it completely covers the garlic heads and seal the edges. Bake for 1 hour, then turn off the heat and keep in the over for one more hour.
4. Remove the baking sheet from the oven and discard the aluminum foil. When the garlic is at room temperature squeeze the flesh out of the cloves and mash it with a blender, a food processor, or a fork.
5. Line a flat tray (I used a plastic lid of a Pyrex pan) with parchment and spread the mashed garlic. Freeze until firm.
6. Cut into 1/2 inch cubes, separate the cubes and freeze in plastic bags. Use as needed :-)

Afterthoughts:
This is a really convenient way to store roasted garlic. Whenever you need some, you have just the right amount ready in the freezer. And it's very cheap, too: you can usually buy a 1 lb bag of garlic for $2-$3, and the cubes will last for a very long time.

To Recipe...

Thursday, November 8, 2012

Healthy Apple Oats Cheesecake Bars

Quick, delicious and as healthy as a cheesecake can possibly be.
Source: Adapted from Pumpkin Streusel Cheesecake Bars as published on Cooking with Chopin, which, in turn, was adapted from The Pajama Chef

Taste: 4 (out of 5)
Difficulty: 1 (out of 5)

Ingredients:
For the base / streusel
- 1 1/2 cups old-fashioned oats
- 1/2 cup all-purpose flour
- 1/2 tsp baking powder
- 1/2 tsp salt
- 1/4 tsp baking soda + 1 tbsp lemon juice
- 1/3 cup honey
- 1/4 cup cold butter, cut into small pieces
- 1/4 cup chopped walnuts
For the cheesecake layer
- 8 oz / 220 g cottage cheese
- 1/4 cup honey
- 2 tbsp all-purpose flour
- 1/2 tsp vanilla
- 1 egg
- 1 1/2 cups apple sauce

Directions
1. Preheat the oven to 350 degrees. Grease a 10"x7" baking dish.
2. Prepare the cookie base in a large bowl. Use a wooden spoon to stir together the oats, flour, salt, and baking powder. Pour 1 tbsp or lemon juice over the baking soda, mix until bubbly and add to the bowl. "Cut in" the butter pieces with two knives or with a pastry cutter until the mixture resembles coarse crumbs. Then stir in the honey with the spoon. Set aside 1/4 cup of the cookie base, add to it walnuts and mix again. Press the remainder of the mixture into the bottom of the prepared pan and bake for 10 minutes.
3. For the cheesecake layer, while the crust is baking, pour the cottage cheese into food processor and blend on high speed until it is uniform. Add the other ingredients, except apple sauce and process until combined.
4. After the cookie base has baked for 10 minutes, remove it from oven. Spread cheesecake filling over the partially-baked crust. Then spread the apple sauce on top. It will most likely sink partially, so you will have swirls rather than 2 separate layers. Sprinkle the reserved cookie topping over the apple sauce and bake for 30 minutes, or until topping is golden brown.
5. The cheesecake must cool down to room temperate (or even be refrigerated) before removing from the pan and cutting, otherwise it will break and sag.
6. Store in the fridge.

Afterthoughts:

- The cheesecake is delicious. There were 2 minor issues with the crust: it was a little too salty, and there was not enough of it. The quantity was completely my fault. The original recipe used an 8"x8" pan, and I used a 10"x7" one, which is larger, but somehow I assumed they had the same area. That's why I had to add walnuts, because after I had filled the pan with the crust there was practically nothing left for the streusel. So next time I would increase the crust quantities by 1/4. Regarding salt, next time I might use 1/4 tsp, or skip it completely.
- The original recipe on Cooking with Chopin used cream cheese and a little less flour for the cheesecake layer. I wanted to save the fat and the calories, so I used cottage cheese. But to make the layer firmer I had to use more flour, and I think the consistency of the cheesecake was perfect. But be sure that you have a very powerful food processor that really can make the cottage cheese uniform. Otherwise you will have those small lumps and it's not the best cheesecake texture (I had already experienced it before).
- Now the funny thing is: the circle is round! I just discovered it now when I was finishing this post and pasting the links. Because this was the first time I visited the "original original" recipe on the Pajama Chef blog, which was later adapted by Cooking with Chopin, which was now adapted yet again by me... And it turned out that the Pajama Chef had Apple Cheesecake that turned into a Pumpkin Cheesecake on Cooking with Chopin and now was again transformed into an Apple Cheesecake ;-P.  I guess one could conclude that both apple and pumpkin are such natural choices for this cake that when one is thinking about changing something, they are the first things that come to mind :-)

To Recipe...

Friday, April 9, 2010

Eggplant Sub and Weightlossophy tip #6: Stick and Carrot

Eggplants have the same shape as baguettes of ciabattas. So why do we only use them as a sandwich filling and not instead of the bread? Check out this gluten free, low calories sub and one more Weightlossophy tip.
This is my spring detox week and along with my some light, healthy recipes I’m also posting the tips that helped me lose 55 pounds over 7 months last year. Today’s tip is harsh, but I think I might not have made it without it.

Stick and Carrot
  It is very common  for dieters to give themselves rewards for good performance: “when I get to 150 lb I will go shopping”, “when I get to 140 lb I am allowed a fancy dinner”, etc. Unfortunately, it did not work for me, because I would always put off the reward for later in order to binge today: “oh, I did not get there this week, no problem - I will get my fancy dinner next week”. 
  This time I had a clear deadline, to achieve which I had to lose at least 1 lb per week. So I decided that I needed both a reward and a punishment: if I lose a pound I get $x to waste on anything I want, if I don’t lose a pound I have to tear up and throw away an $x bill. x can be any amount that is painful enough to throw. By the way, throw means throw, not giving it to your friend or your favorite charity. There should be no justification, nothing to make you feel good about missing your target. Of course, the reward and the punishment can be anything: if I am good I will buy new jeans, if I am bad I will be doing dishes by hand all week. The main point is that the reward should be appealing and the punishment should be very detterring
  I know this tip does not sound good, but for me it made a huge difference - I have not missed the target even once. My “judgement day,” when I weighted myself to check for that lost pound, was Monday, and that was particularly effective because it prevented many weekend binges.
  Another argument that helped me accept this harsh punishment regiment was that so many
people pay tons of money weekly for private coaches, support groups, etc. So I thought: I would be “paying” only for weeks when I am bad, for good weeks I’ll be getting my rewards :-).
  Side-note: The weeks when I was traveling were exempt from my carrot and stick policy - I chose to enjoy my vacations.
And now the gluten-free detox recipe
Eggplant Sub
Source 
Improvised
Taste 4 (out of 5)
Difficulty 1 (out of 5)
Ingredients
- 1/2 eggplant (30 cal)
- 1 slice red onion (10 cal)
- 1 garlic clove (5 cal)
- 3 mushrooms (10 cal)
- 2 rings red bell pepper (5 cal)
- 2 slices tomato (5 cal)
- 1 tsp canola oil (40 cal)
- 1 lettuce leaf
- 1/2 cup chicken or vegetable stock or water (5 cal)
- chopped basil, salt and pepper to taste
Total 110 cal, 1 serving
Instructions
1. Slice the eggplant in half lengthwise. Sprinkle with a generous amount of salt and let stand for 20-30 minutes. Rinse the salt. 
2. Preheat a dry frying pan over medium high heat and cook the eggplants on it, occasionally stirring them to make sure they don’t stick to the pan. If they do, add a little stock or water. Cook for about 10 minutes on each side.
3. Mince the garlic, finely chop the mushrooms and the onion, and saute with 1 tsp of oil over medium heat for about 20 minutes, stirring. If needed add a little stock or water. Add the bell pepper, season with basil, salt and pepper and cook for 5 more minutes.
4. Place lettuce over one half of the eggplant, top the sauteed mushrooms and peppers, add the tomato slice and cover with the second eggplant half. Enjoy your sandwich!
Afterthoughts
I was not sure how the eggplants would turn out if fried without oil, and found them quite juicy. Of course, if you don’t count calories, feel free to use oil. I  bet it would also be great to grill them, but I ain’t got no grill :-(. 

To Recipe...

Wednesday, April 7, 2010

Buckwheat with Leeks and Brussels Sprouts and Weightlossophy tip #4: Eat before You Get Hungry

Buckwheat is a healthy and delicious side dish for meat, poultry, fish or veggies. Plus one more weight loss tip that you’ll love!
Yesterday I published the first 3 guiding principles that helped me lose 55 pounds over 7 months. Here is the fourth tip from my Weightlossophy, followed by the buckwheat recipe.

Eat Before You Get Hungry
  This sounds really cool, does not it? For me it was a crucial component. 
  Most of the weight loss books tell you to eat only when you are hungry and to stop eating before you get full. It takes the digestive system 15-20 minutes to send the “I’m full” signal to the brain, so if stop eating when you feel full it means that for the last 15-20 minutes you’ve been overeating.  
  Exactly because of this delay “I’m full” signal, I find this nutritionists’ advice absolutely useless. I primarily eat not because I’m hungry, but because I love eating, one of my most favorite activities in the world.  So it is hard for me to stop eating even when I’m exploding. But to stop eating when I am hungry?! No way! When I’m hungry I just eat anything available, and since it usually takes some time to prepare the healthier option, I often end up eating something less healthy as long as it’s ready. I also eat fast, and portion control is practically impossible. 
  So I decided to eat before I get hungry. This way I have a better control over what I eat. I can eat slowly and enjoy the food more. And since I feel full to begin with, it’ not as difficult to stop eating. The best thing for me is to niggle regularly on fruits, vegetables, nuts and berries between the main meals and to have very small portions during the meals. As long as I keep count of my snacks, I am not in danger of overeating this way. And I always  know that the next snack is coming up very soon, so I don’t feel deprived.  
  One more benefit of eating small amounts continuously: your digestive system gets a more regular supply of food, so it’s also a good way to prevent insulin spikes and waves of tiredness after large meals.
And here is the small meal of the day (the third day of my spring detox)
Buckwheat with Leeks and Brussels Sprouts
Source 
Improvised
Taste 5 (out of 5)
Difficulty 1 (out of 5)
Ingredients
- 1/4 cup buckwheat groats (160 cal)
- 1/2 cup water
- 3 oz brussels sprouts (35 cal)
- 2 oz leeks (35 cal)
- 1 oz bell pepper (10 cal)
- 2 garlic cloves (10 cal)
- 1 tsp canola oil (40 cal)
- basil leaves, salt and pepper taste
Total 190 cal, 1 serving

Instructions
1. In a small sauce pan bring the buckwheat with 1/2 cup of water to a boil, add 1 minced garlic clove and salt to taste, and let simmer for about 15 minutes. Do not overcook. You can skip garlic, I just love it and add it to everything. Buckwheat is wonderful with butter. I did not add butter today, because I am on a detox diet, but if you are not, just place some butter over the warm buckwheat, let it melt a little and mix.
2. While your buckwheat is cooking wash the vegetables. Crush the reaming garlic, chop the leeks and the pepper, and half the brussels sprouts. In a small frying pan preheat 1 tsp of canola oil. Add the garlic and the leeks. Saute for about 5 minutes. Add the brussels sprouts. If you need more liquids add a little water or chicken broth. After 5 more minutes season with chopped basil, salt and pepper, stir well and cook 2-3 more minutes. Your veggies should be ready just in time for the buckwheat.
Afterthoughts
- I eat buckwheat simply because it’s very tasty. But just for this post, I did a quick online search on the health properties of buckwheat. So here they are: buckwheat helps adjust metabolism, decreases cholesterol and blood pressure, improves blood circulation and protects against breast cancer. 
- Try to buy unprocessed buckwheat. The one you get in the supermarkets is usually precooked, and as soon as you add a little water it gets too soft and loses all texture, almost all flavor, and probably most of the nutrients. The best bet is to buy buckwheat from Eastern European stores. 

To Recipe...

Monday, April 5, 2010

Horseradish Lemon Honey and Spring Detox

1 tablespoon of this healthy potion every morning for a cold-free winter, better digestion and a stronger immune system.
  This week I am going on a short 7 day detox diet. With all the cooking and baking this winter, I think it might be good to give the body a little spring cleanse. I had already had one detox like this last year - I have to admit I did not feel any different after it, but it didn’t hurt and I lost a couple of pounds. So why not do it again? 
  I am not following any specific regimen. I am skeptical of any food supplements, so I am not using packaged formulas, only limiting the foods I eat. 
  Based on a brief on-line research, the main idea in a detox is to eliminate alcohol, caffeine, gluten and lactose (no bread, soy sauce or milk products - only plain yogurt with live cultures is allowed), minimize processed foods, sugars and meats, eat as much organic as possible and drink at least half a gallon of water a day. So that’s what I’m going to do. 
  In addition, every day I will be taking 1 tablespoon of freshly ground flax seeds with a glass of water in the morning, and a cup of a laxative senna tea in the evening, to help the digestion. 
  The first day I will try to fast, only drinking water and herbal teas. But if I get too hungry or too weak I’m allowed 1 apple, 1 orange and 1 grapefruit. 
  And every day I will be posting 1 healthy recipe and a tip on weight loss that worked for me. 
Since today is my fast-day, and I’m not cooking anything, I am posting a recipe of a Horseradish-lemon-honey potion, that I’ve been taking for the last year. It is not tasty at all, but one tablespoon of it every morning had helped me and my parents pass a cold and flu-free winter. 
  So here is the Horseradish recipe, and if you are curious to see how last year I had lost 55 lb over 7 months, check back again later, for my “Weightlossophy” postings. 
Horseradish Lemon Honey 
Source
My mom heard about this remedy somewhere and convinced me to try.
Taste 1 (out of 5)
Health Benefit 5 (out of 5) at least for me
Difficulty 2 (out of 5)
Ingredients
- 1 horseradish root
- 2 cups water
- 1 lemon
- 2/3 cup honey

Instructions
1. Day 1: Peel and finely grate the horseradish root. It can be done by hand, but you’ll be shedding many tears and your fingers may burn. So I recommend cutting the horseradish into cubes and using your food processor. You can add a little water to the food processor to help with the shredding. Place the grated horseradish into a jar or another lidded container, with a capacity of 5-6 cups. Add 2 cups of water, stir well and cover your container tightly with a lid. Leave the horseradish in the refrigerator for a week.
2. Day 8: Wash the lemon, do not peel, and puree it whole (skin, seeds and all) in a food processor. Add the lemon puree and the honey to the horseradish, mix well, cover with a lid and leave in the refrigerator for another week. 
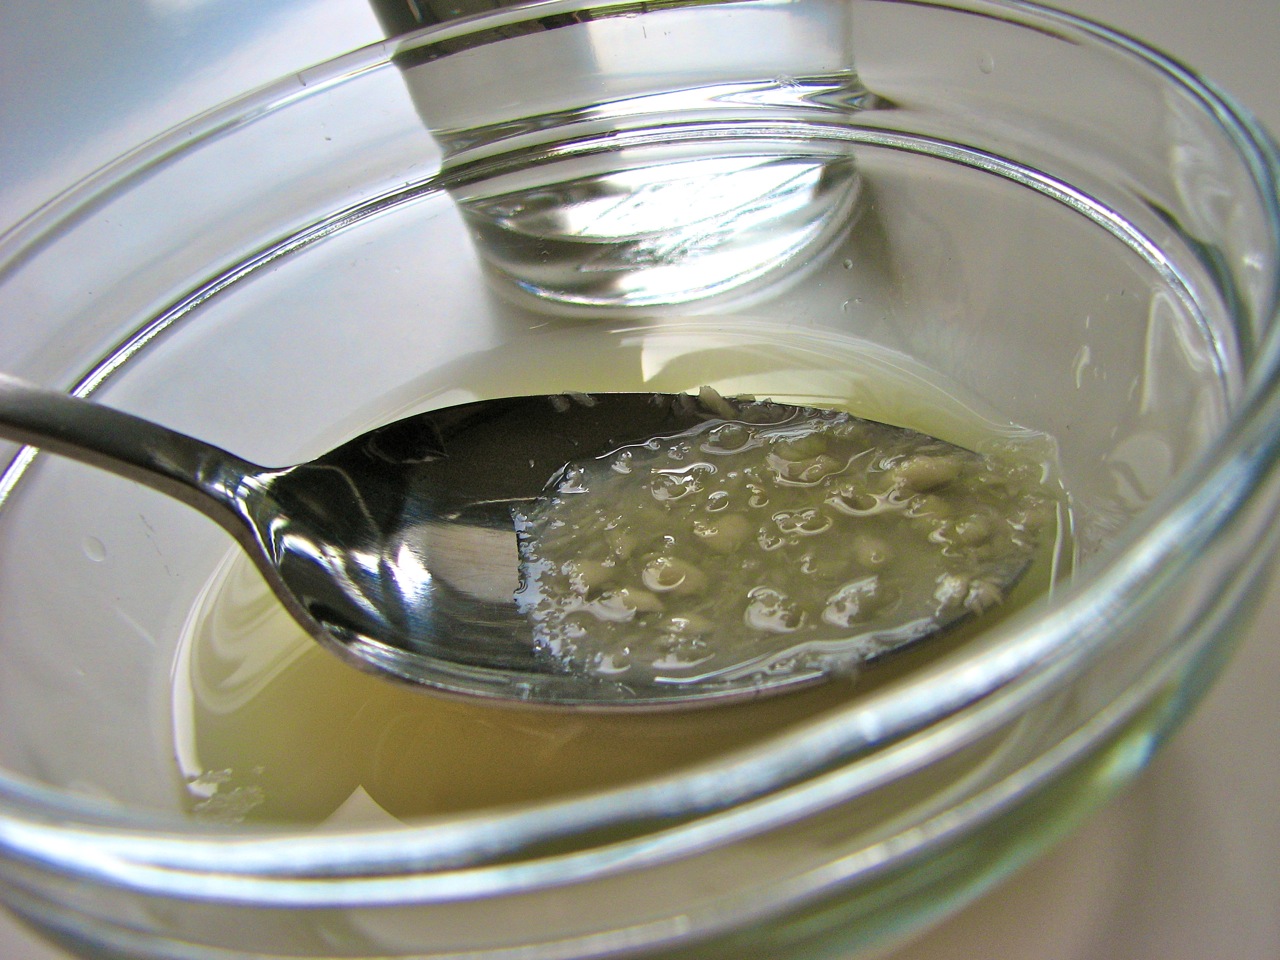
3. Day 15 and on: Now your health potion is supposed to be ready. Every day, first thing in the morning take 1 tablespoon of this horseradish lemon honey mix with a glass of water. To your health!
Afterthoughts
- My mom found this recipe somewhere and convinced me to try. I was skeptical, but eventually gave in. To tell the truth, it tastes pretty bad to me. And you don’t see the benefits immediately, so it’s hard to find motivation to persevere at first. But after passing my first winter without a single serious cold or flu (when I had always had at least 2-3 colds lasting over a week) I am finally convinced. I don’t have statistical data, and don’t claim that it’s good for everyone. All I know is that my parents and I passed a cold free winter. Even though I was living with and taking care of my boyfriend who had a really bad cold or flu (we still don’t know which) that lasted more than 2 months (my boyfriend did not want to take the horseradish drink, if you’re wondering).
- Horseradish root’s pungency can vary from a relatively mild flavor to an extremely sharp one. So on day 15 try a little bit of your mixture first. It should be strong, and may make your eyes watery, but it should not cause heartburn or any serious discomfort. If it’s too strong and burns your palate, add more honey and lemon and let it rest several more days.  If it is still too strong, you might want to run it through a sieve, discard the horseradish and mix the remaining liquid with more water, until it becomes drinkable. 

To Recipe...