AdSense Full Screen test

Thursday, April 8, 2010

Salad Bouquet and Weightlossophy tip #5: Spend time on Non-Eating Food-Related Activities

Celebrate the beauty and flavor of simple vegetables with a festive design. Plus the weight loss tip of the day.
Over the last two days I published the first 4 guiding principles that helped me lose 55 pounds over 7 months. This is my 5th Weightlossophy tip.

Spend time on non-eating food-related activities
  I am obsessed with food, have always been. I am one of those who remember places by the foods they ate there. A huge portion of my thoughts is dedicated to food, often even when I am actively doing something else. I suppose that’s just how I am and I have to accept it, especially since for me food is one of the greatest joys in life, and I don’t want to deprive myself of it. 
  But thinking about food does not necessarily have to lead to munching. You can direct all this food-addict energy into other food-related activities that will actually distract you from eating. Like planning what you are going to eat, looking up the recipes, doing grocery shopping, reading restaurant reviews and menus, cooking, counting calories (additional benefit of Tips #2), taking pictures of your food, and blogging about it (yes, yes - that’s one of the main reasons I started a food blog). 
  
  A perfect example of a non-eating food-related activity is the Salad Bouquet recipe below. Yesterday evening I spent at least half an hour thinking about the design. Today I spent another 30 minutes actually “building” it. Then at least 1 hour taking the pictures (we barely have any windows at home, so my only chance at natural light is on our small balcony in pretty ridiculous conditions ;-) ). And now finally writing this up. This gives you 2-3 hours happily dealing with food and consuming 0 calories. Not too bad, I think.
Salad Bouquet
Source 
Improvised
Taste 5 (out of 5)
Difficulty 2 (out of 5)
Ingredients
- 4,5 thin round slices + 1/2 tomato (10 cal)
- 4,5 thin round slices daikon radish (5 cal)
- 10-15 small lettuce leaves (10 cal)
- 2-3 twigs watercress
- 1-2 twigs parsley
- 1 medium bell pepper (30 cal)
- 1/2 mini cucumber (10 cal)
- 1 tbsp no-fat yogurt (10 cal)
- 1/2 tsp freshly squeezed lemon juice 
- 1/2 green onion
- salt and pepper to taste
Total 75 cal, 1 serving
Instructions
1. For the vase: Cut the top and the bottom of the bell pepper. Clean the remaining cylinder and fill with lettuce leaves, parsley and watercress twigs. 
2. For the flours: Place the thin round strips of daikon radish and tomato in a raw so that the overlap slightly and roll them all together to create a “rose”. For tomatoes it might be easier to use thin strips of tomato skins, especially for the finer “petals”. Place the roses inside the lettuce. With vegetable peeler cut thin slices of mini cucumber and arrange them “artistically” all around.
3. For the dressing: Peel 1/2 tomato, and blend together with the yogurt and the lemon juice. Add the finely chopped green onion and use the bell pepper tip (the one without the stem) to serve the dressing.

Afterthoughts
You can serve this salad as an individual dish, but it would probably fit better as a decoration for a large salad bowl on a dinner table. Of course, if you have a large salad, you can use one additional pepper to accommodate a larger amount of dressing.

To Recipe...

Wednesday, April 7, 2010

Buckwheat with Leeks and Brussels Sprouts and Weightlossophy tip #4: Eat before You Get Hungry

Buckwheat is a healthy and delicious side dish for meat, poultry, fish or veggies. Plus one more weight loss tip that you’ll love!
Yesterday I published the first 3 guiding principles that helped me lose 55 pounds over 7 months. Here is the fourth tip from my Weightlossophy, followed by the buckwheat recipe.

Eat Before You Get Hungry
  This sounds really cool, does not it? For me it was a crucial component. 
  Most of the weight loss books tell you to eat only when you are hungry and to stop eating before you get full. It takes the digestive system 15-20 minutes to send the “I’m full” signal to the brain, so if stop eating when you feel full it means that for the last 15-20 minutes you’ve been overeating.  
  Exactly because of this delay “I’m full” signal, I find this nutritionists’ advice absolutely useless. I primarily eat not because I’m hungry, but because I love eating, one of my most favorite activities in the world.  So it is hard for me to stop eating even when I’m exploding. But to stop eating when I am hungry?! No way! When I’m hungry I just eat anything available, and since it usually takes some time to prepare the healthier option, I often end up eating something less healthy as long as it’s ready. I also eat fast, and portion control is practically impossible. 
  So I decided to eat before I get hungry. This way I have a better control over what I eat. I can eat slowly and enjoy the food more. And since I feel full to begin with, it’ not as difficult to stop eating. The best thing for me is to niggle regularly on fruits, vegetables, nuts and berries between the main meals and to have very small portions during the meals. As long as I keep count of my snacks, I am not in danger of overeating this way. And I always  know that the next snack is coming up very soon, so I don’t feel deprived.  
  One more benefit of eating small amounts continuously: your digestive system gets a more regular supply of food, so it’s also a good way to prevent insulin spikes and waves of tiredness after large meals.
And here is the small meal of the day (the third day of my spring detox)
Buckwheat with Leeks and Brussels Sprouts
Source 
Improvised
Taste 5 (out of 5)
Difficulty 1 (out of 5)
Ingredients
- 1/4 cup buckwheat groats (160 cal)
- 1/2 cup water
- 3 oz brussels sprouts (35 cal)
- 2 oz leeks (35 cal)
- 1 oz bell pepper (10 cal)
- 2 garlic cloves (10 cal)
- 1 tsp canola oil (40 cal)
- basil leaves, salt and pepper taste
Total 190 cal, 1 serving

Instructions
1. In a small sauce pan bring the buckwheat with 1/2 cup of water to a boil, add 1 minced garlic clove and salt to taste, and let simmer for about 15 minutes. Do not overcook. You can skip garlic, I just love it and add it to everything. Buckwheat is wonderful with butter. I did not add butter today, because I am on a detox diet, but if you are not, just place some butter over the warm buckwheat, let it melt a little and mix.
2. While your buckwheat is cooking wash the vegetables. Crush the reaming garlic, chop the leeks and the pepper, and half the brussels sprouts. In a small frying pan preheat 1 tsp of canola oil. Add the garlic and the leeks. Saute for about 5 minutes. Add the brussels sprouts. If you need more liquids add a little water or chicken broth. After 5 more minutes season with chopped basil, salt and pepper, stir well and cook 2-3 more minutes. Your veggies should be ready just in time for the buckwheat.
Afterthoughts
- I eat buckwheat simply because it’s very tasty. But just for this post, I did a quick online search on the health properties of buckwheat. So here they are: buckwheat helps adjust metabolism, decreases cholesterol and blood pressure, improves blood circulation and protects against breast cancer. 
- Try to buy unprocessed buckwheat. The one you get in the supermarkets is usually precooked, and as soon as you add a little water it gets too soft and loses all texture, almost all flavor, and probably most of the nutrients. The best bet is to buy buckwheat from Eastern European stores. 

To Recipe...

Tuesday, April 6, 2010

How I lost 55 pounds in 7 months

Last year I managed to lose 55 pounds (25 kg) in 7 months. I am 5’5 (165cm) tall, so for me it meant going from size 14 to size 4 and sometimes 2. 
  I think the primary key to my success was a very strong motivation, but there were also some practical aspects that helped me persevere. Here are the main three rules which I found useful. In the following days I will be posting one more tip per day. I know that in dieting there is no silver bullet - things that work for some would be absolutely irrelevant or even harmful for others. So I am not suggesting that you follow all these tips, rather I hope you find some of them inspirational :-)
My Weightlossophy
1. Know how much you are burning.  
  I tended to hugely overestimate the energy that I burned when working out, primarily thanks to treadmills, ellipticals and workout videos that claim you burn 1000 calories in an hour. But then I had a metabolic assessment and discovered that I actually burned 400 calories, 100 out of which I would have burnt anyway, by simply being alive. Before that I had always thought: “I worked out so hard, I deserve some extra ice cream... or 2”. Now I knew why when I managed to stick to a workout routine, I’d gain weight :-).
  Metabolic assessment tells you how many calories you, personally, burn performing specific activities, such as sleeping, working, cleaning the house, running, walking, etc. I used Senswear, a small equipment you wear on your arm, which continuously measures your calorie burn based on your heart rate, body temperature, etc. Another equipment I found online that seems similar is Bodybugg
  Such equipment can be pricey to buy. Sometimes you can rent it from your gym. But even if you don’t have access to a personal metabolic assessment, you can approximate your calorie burn based on your weight, age and activity type on several sites, such as Nutritiondata or Healthstatus, which usually turn out quite accurate for me.
  Note of caution:
as you lose weight you burn less calories for the same activity, so when you slim substantially, you might want to update your calculations. I know it’s sad, but hey - you’re getting thinner ;-)
2. Calculate how much you eat
  It is very tempting to believe that you can eat as much of the “non-fat” yogurt as you want, or that you should eat “plenty” of “healthy” foods. Walnuts are great for you, and it’s so easy to reach out and grab 2,3,4 more walnuts - how many calories can there be? Well, in 4 walnuts there are 100 calories, something that takes me an hour to burn. Not to mention “unhealthy” foods, where in a singe slice of an amazingly delicious cheesecake there can be 1400 calories - pretty much all my daily ration.
  My favorite online resource for calculating calories is CalorieKing. But there are many more great sites like that. After a while, as you become more experienced, counting calories gets much easier because you remember many items by heart, especially the ones you eat the most.
3. Record everything
  Now that you know how much you burn and how much you eat, record it all. Take a small piece of paper with you to work: it is so easy to forget a 100 calorie cookie that you munched on. Then add up everything and see what is your daily balance. It can be quite eye opening to keep such a record for a while. If you also weigh yourself every day, or at least once a week, you can see how your calorie balance impacts your weight. They say that
a deficit of 3500 calories results in a weight loss of 1 lb. That was approximately true for me. 
  Don’t cheat! Don’t round up your workout time and round down the calories in your meals. It will only upset you in the long term, because you will feel that you’ve spent so much time and effort being “good”, and still have not lost any weight. 
  After a while it will be very satisfying to look back at your honest track record and see how well you were doing and how much weight you lost as a result. You can even make a graph, like mine (or prettier) to boost your morale :-).
I will be posting one additional tip from my “Weightlossophy” every day for the rest of my detox diet (April 11, 2010). So if you’re interested, check back in. Or if you have a thought or a question, please leave a comment,  and I’ll be happy to get the conversation going. 

To Recipe...

Monday, April 5, 2010

Horseradish Lemon Honey and Spring Detox

1 tablespoon of this healthy potion every morning for a cold-free winter, better digestion and a stronger immune system.
  This week I am going on a short 7 day detox diet. With all the cooking and baking this winter, I think it might be good to give the body a little spring cleanse. I had already had one detox like this last year - I have to admit I did not feel any different after it, but it didn’t hurt and I lost a couple of pounds. So why not do it again? 
  I am not following any specific regimen. I am skeptical of any food supplements, so I am not using packaged formulas, only limiting the foods I eat. 
  Based on a brief on-line research, the main idea in a detox is to eliminate alcohol, caffeine, gluten and lactose (no bread, soy sauce or milk products - only plain yogurt with live cultures is allowed), minimize processed foods, sugars and meats, eat as much organic as possible and drink at least half a gallon of water a day. So that’s what I’m going to do. 
  In addition, every day I will be taking 1 tablespoon of freshly ground flax seeds with a glass of water in the morning, and a cup of a laxative senna tea in the evening, to help the digestion. 
  The first day I will try to fast, only drinking water and herbal teas. But if I get too hungry or too weak I’m allowed 1 apple, 1 orange and 1 grapefruit. 
  And every day I will be posting 1 healthy recipe and a tip on weight loss that worked for me. 
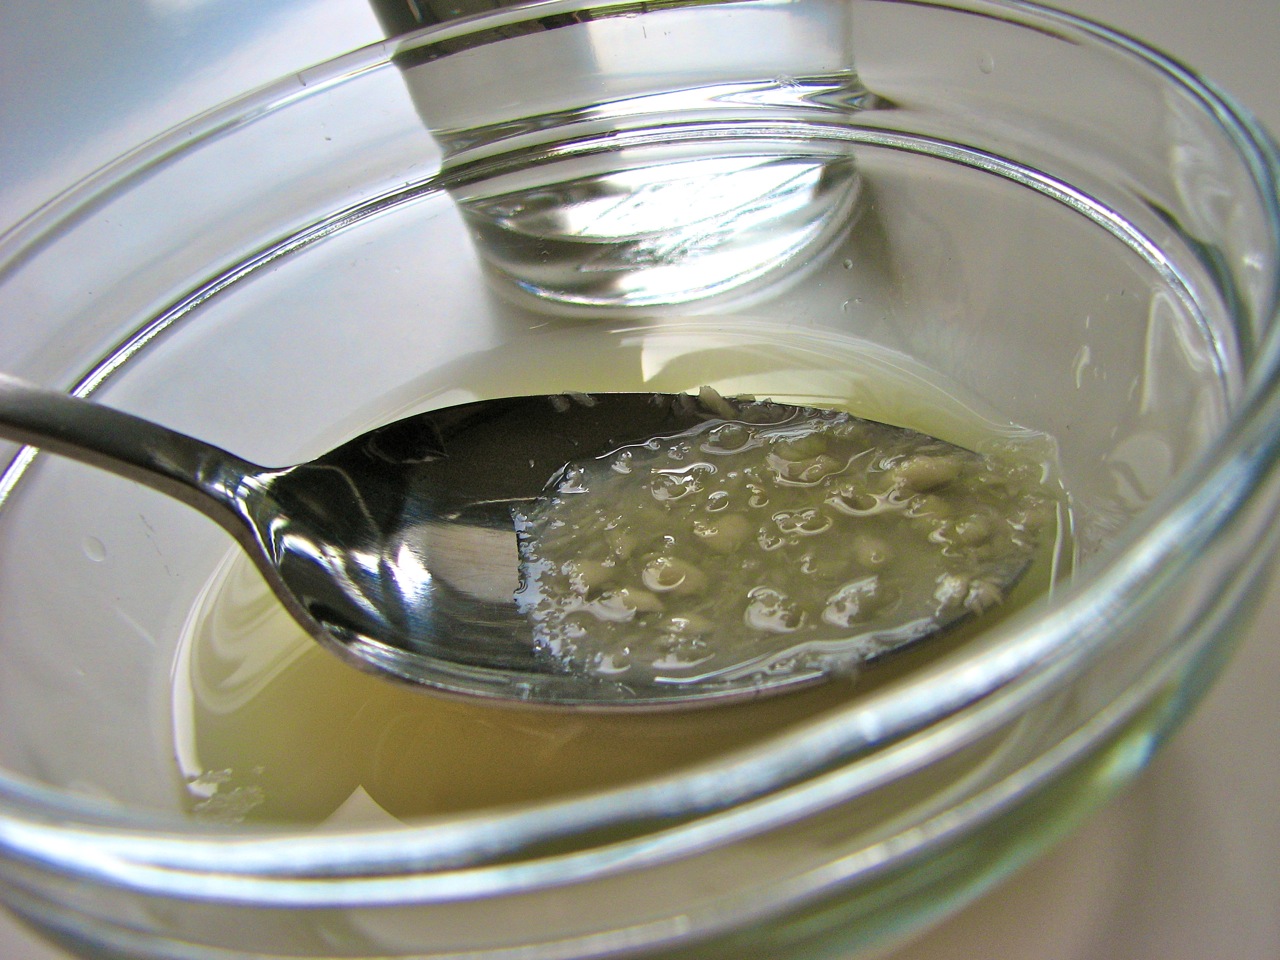
Since today is my fast-day, and I’m not cooking anything, I am posting a recipe of a Horseradish-lemon-honey potion, that I’ve been taking for the last year. It is not tasty at all, but one tablespoon of it every morning had helped me and my parents pass a cold and flu-free winter. 
  So here is the Horseradish recipe, and if you are curious to see how last year I had lost 55 lb over 7 months, check back again later, for my “Weightlossophy” postings. 
Horseradish Lemon Honey 
Source
My mom heard about this remedy somewhere and convinced me to try.
Taste 1 (out of 5)
Health Benefit 5 (out of 5) at least for me
Difficulty 2 (out of 5)
Ingredients
- 1 horseradish root
- 2 cups water
- 1 lemon
- 2/3 cup honey

Instructions
1. Day 1: Peel and finely grate the horseradish root. It can be done by hand, but you’ll be shedding many tears and your fingers may burn. So I recommend cutting the horseradish into cubes and using your food processor. You can add a little water to the food processor to help with the shredding. Place the grated horseradish into a jar or another lidded container, with a capacity of 5-6 cups. Add 2 cups of water, stir well and cover your container tightly with a lid. Leave the horseradish in the refrigerator for a week.
2. Day 8: Wash the lemon, do not peel, and puree it whole (skin, seeds and all) in a food processor. Add the lemon puree and the honey to the horseradish, mix well, cover with a lid and leave in the refrigerator for another week. 
3. Day 15 and on: Now your health potion is supposed to be ready. Every day, first thing in the morning take 1 tablespoon of this horseradish lemon honey mix with a glass of water. To your health!
Afterthoughts
- My mom found this recipe somewhere and convinced me to try. I was skeptical, but eventually gave in. To tell the truth, it tastes pretty bad to me. And you don’t see the benefits immediately, so it’s hard to find motivation to persevere at first. But after passing my first winter without a single serious cold or flu (when I had always had at least 2-3 colds lasting over a week) I am finally convinced. I don’t have statistical data, and don’t claim that it’s good for everyone. All I know is that my parents and I passed a cold free winter. Even though I was living with and taking care of my boyfriend who had a really bad cold or flu (we still don’t know which) that lasted more than 2 months (my boyfriend did not want to take the horseradish drink, if you’re wondering).
- Horseradish root’s pungency can vary from a relatively mild flavor to an extremely sharp one. So on day 15 try a little bit of your mixture first. It should be strong, and may make your eyes watery, but it should not cause heartburn or any serious discomfort. If it’s too strong and burns your palate, add more honey and lemon and let it rest several more days.  If it is still too strong, you might want to run it through a sieve, discard the horseradish and mix the remaining liquid with more water, until it becomes drinkable. 

To Recipe...

Sunday, April 4, 2010

Peach Mousse

... with cottage cheese - 125 calories apiece. Can also be made into ice cream.
Source 
Improvised
Taste 5 (out of 5)
Difficulty 1 (out of 5)
Ingredients
- 350 g cottage cheese (320 cal)
- 450 g canned peaches with juice (245 cal)
- 1 cup heavy whipping cream (820 cal)
- 1/4 cup sugar (195 cal)
- 2 tbsp gelatin powder 
- 1/4 cup water
- 2 oranges (160 cal)
- 10 strawberries (220 cal)
Total 1960 cal, 16 servings, 125 cal / serving
Instructions
1. In a food processor blend the cottage cheese with the canned peaches until completely smooth. 
2. Sprinkle the gelatin over 1/4 cup of lukewarm water and let stand for about 3-4 minutes. Stir well and heat the gelatin water until all the gelatin melts. Mix the gelatin water into the cottage cheese. 
3. Beat the heavy cream with the sugar until stiff. Carefully fold the cottage cheese mixture into the whipped cream. Pour the mousse into 16 1/2 cup ramekins. 
4. Peel and cut the oranges into wedges, slice the strawberries and place in the ramekins on top of the mousse. Let set in a fridge for about 2 hours.
Afterthoughts
- You can serve the mousse with chocolate shavings, cookie crumb, syrup and fruit.
- For ice cream skip the gelatin and simply freeze the cottage cheese - whipping cream mixture. I don’t have an ice cream maker, without which the result is more of an icicle than an ice cream, but the taste is still good.

To Recipe...

Friday, April 2, 2010

Bread Wreath

A cute variation on a pain d’Epi or a baguette
Source
I probably saw this somewhere on the internet and don’t remember where, or maybe even came up with the design myself...
Taste 5 (out of 5)
Difficulty 1 (out of 5)
Ingredients
- 3 3/4 cups white all purpose flour (1670 cal)
- 3/4 tbsp active dry yeast
- 1/2 tbsp salt
- 1 1/2 cups of water
Total 1670 cal, 3 wreath breads or baguettes, 555 cal / bread

Instructions
1. Mix all the ingredients in a container that has a non-airtight lid. Knead with your hands for about 5 minutes the dough is uniform.
2. Cover with the lid and allow to rise for about 2 hours until doubles in volume. Refrigerate for up to 2 weeks. 
3. Cut about 1/3 of the dough with kitchen scissors. Follow the directions for making pain d’Epi here. Once the pain d’Epi is formed, slightly flour baking sheet lined with a parchment paper, move the bread there and brings the ends of the bread together, pinching them to create a wreath. 
4. Let the bread rest for about 40-50 minutes. In the meantime, preheat the oven to 450F. If you’re using the stone, place it in the oven before you begin the preheat. You also need an empty broiler tray in the oven to generate steam.
5. You can brush the top of the bread with egg white wash right before baking (1 egg white + 1 tbsp water) for a shining finish.
6. Slide the bread with the parchment paper onto the baking stone. Or simply place the parchment with the bread on top of a baking sheet and slide the sheet into the oven. Very carefully pour about 1/2 cup of hot tap water into the broiler tray and immediately close the oven door. 
7. Bake for about 30 minutes, until the bread is golden brown. Remove from the oven, peel off the parchment paper and let cool on a rack.
Afterthoughts
I tried to make similar recipes with the original Master Recipe from the Artisan Bread in 5, but the dough is so wet, that I can barely shape it into anything other than a boule. So I added more flour and kneaded the bread a little bit to boost gluten development. 

To Recipe...

Thursday, April 1, 2010

Mushroom and Eggplant Quiche

Mushrooms, eggplant, garlic, cheese and a sour cream-based dough. Very tasty and only 300 calories per serving! 
Source 
Improvised
Taste 5 (out of 5)
Difficulty 2 (out of 5)
Ingredients
For the dough
-  2 cups all purpose flour (910 cal)
- 6 oz / 170 g no-fat sour cream (115 cal)
- 2 oz / 60 g margarine or butter (430 cal)
- 1/2 tsp baking powder
Only use about 2/3 for a 9-inch pie pan (1455 * 2 / 3 = 970 cal)
For the filling
- 11 oz / 300 g white mushrooms (65 cal)
- 11 oz / 300 g / 1 medium eggplant (70 cal)
- 5 green onions (10 cal)
- 2 garlic cloves (10 cal)
- 3 tbsp fresh parsley, chopped
- 1/2 cup chicken broth (5 cal)
- 1 tsp shiro miso paste
- 2 tbsp milk (15 cal)
- 1 tbsp butter (100 cal)
- 1 tbsp canola oil (120 cal)
- 6 oz / 170 g gruyere cheese, roughly shredded (735 cal)
- 6 oz / 170 g no-fat sour cream (115 cal)
- 2 eggs (140 cal)
- 2 egg whites (30 cal)
- salt and pepper to taste
Total 2385 cal, 8 servings, 300 cal / serving
Instructions
1. Cut the eggplants into 1/2 inch cubes. Generously sprinkle with salt and allow to stand for about 30 minutes (this will remove the bitterness from the eggplant). 
2. In a large bowl, combine all the ingredients for the filling and mix well with a large wooden spoon. Then knead with your hands until all the ingredients are uniformly incorporated. Wrap the dough in a plastic wrap and refrigerate for 30 minutes. 
3. Wash and cut the mushrooms into 4-5 slices each. Finely chop the green onions and mince the garlic. In a large frying pan heat 1 tbsp of oil on medium heat, add the mushrooms, the onions and the garlic and saute until the garlic and the onions start to brown and the mushrooms dry a little. 
4. Wash the eggplant to remove excess salt and add to the mushrooms together with the chopped parsley.
5. Mix the shiro miso paste with the chicken broth and the milk. Pour over the mushroom-eggplant mixture, add the butter and stir. Cook for about 10-15 minutes on low-medium heat.
6. Preheat the oven to 350F. Grease a 9 inch pie pan. Roll out the dough (it is very easy to roll :-) ) in a circle of about 11 inches, so that it covers the sides of the pan. Using your rolling pin, move the dough and place into the greased pan. With your fingers, press the dough into the pan. Remove any access dough and freeze for future use. I used about 2/3 of the dough for a 9 inch pan and am going to make individual quiches with the leftovers.
7. Pour the eggplant-mushroom filling over the base and spread evenly. 
8. In a separate bowl, beat together the eggs, the egg whites and the sour cream. Mix in the shredded gruyere cheese, and pour over the mushrooms.
9. Bake for about 50 minutes, until the filling sets and the quiche is golden brown.
Afterthoughts
- Great taste, not too many calories, easy to make, pretty to serve, what else can one wish for?
- I am so glad I had all this no-fat sour cream about to expire and was looking for a way to use it :-). Otherwise I probably would not have thought of adding sour cream to a quiche. The sour cream dough is really really easy to work with.

To Recipe...

Tuesday, March 30, 2010

Lychee Mousse Cake

The lychee mousse is amazingly delicious, so this cake will taste great even when all the other components of are messed up :-)
Source
Adopted from Reader’s Digest “Baking with Love”, Raspberry Torte recipe
Taste 5 (out of 5)
Difficulty 3 (out of 5)
Ingredients
For the sponge
- 1/4 cup / 55 g caster sugar (215 cal)
- 1 tsp vanilla essence (10 cal)
- 2 eggs (140 cal)
- 1/2 cup / 60 g brown sugar (275 cal)
- 1/4 tsp baking powder
For the pastry
- 1 cup / 125 g all purpose flour (455 cal)
- 1/2 tsp baking powder
- 1/4 cup / 60 g butter (405 cal)
- 2 tbsp brown sugar (105 cal)
- 1 egg yolk (55 cal)
For chocolate layer and filling
- 1/3 cup / 50 g dark chocolate (245 cal)
- 2 1/2 cups / 300 g lychees (200 cal)
- 1 1/3 cups / 350 g non fat plain yogurt (180 cal)
- 1/5 cup / 50 ml lemon juice (15 cal)
- 1 tbsp / 14 g powdered clear gelatin
- 1 1/2 cups / 375 ml whipping cream (1100 cal)
For the glaze and decoration
- 10 strawberries (220 cal)
- 2 tbsp raspberry jam (70 cal)
- 1/2 cup lychee syrup (100 cal)
- 1/2 tsp powdered gelatin
Total 3790, 12 servings, 315 cal / serving
Instructions
1. Use 2 9-inch spring-form pans, or you can also get along with 1 if that’s all you got. Grease the base and side of one tin. Preheat the oven to 350F. 
2. For the sponge: beat the sugar, vanilla essence, eggs and 1 tsp cold water until fluffy. Mix flour and baking powder and sift over the egg mixture. Fold in with a whisk. Spread the sponge mixture in the greased tin. Bake for 20-25 minutes. Remove the tin from the oven, loosen the sides with a knife and open the spring-form. Turn sponge layer onto parchment paper or a silicon mat. Do not remove the base of the tin. Let the sponge cool.
3. For the pastry: combine all the ingredients in a bowl, knead into a smooth dough. Shape into a ball, press flat, wrap in cling wrap and chill for 30 minutes. Grease base of the second spring-form tin. Roll out pastry to line base of tin and prick several times with a form. Bake for 12-15 minutes. Remove from the oven, cool on a wire rack. Remove from the tin.
4. For the chocolate layer: melt chocolate in a bowl of simmering water (or in a microwave) and spread over cooled pastry base. Remove base of the tin and baking paper of the pastry base with top facing downwards. Place a cake ring around the pastry and the sponge. 
5. For the filling: puree the lychees, combine with sugar, yogurt and lemon juice. Sprinkle the gelatin over 1/4 cup of warm water in a small saucepan. Stir over a low heat until dissolved. Stir into the lychee  mixture. Beat the cream until stiff. As soon as the lychee mixture begins to set, stir in the cream and pour onto the sponge base, smooth the top. Allow to set in the fridge for 1 1/2 hours.
6. Cut the strawberries into 3-4 slices lengthwise. Soak them in the lychee syrup, especially if they are not very sweet. 
7. For the glaze: combine lychee syrup with jam, place in a small sauce pan and bring to a boil. Remove from the heat and pour the mixture through a fine sieve (if the jam has seeds). Mix the gelatin with 2 tbsp of warm water, and then add to the hot glaze. 
8. Arrange the strawberries on top of the lychee mousse. When the glaze has cooled a little, pour it over the strawberries. Chill in the refrigerator for 1 more hour. 
9. When the cake is firm, loosen the cake with a sharp knife and gently remove the ring.
Afterthoughts
- Most of the steps in this recipe did not turn out as I expected, even though I followed them quite precisely, but the lychee mousse was so good, that I really think this cake tastes 5 out of 5. 
- What went wrong? First, the pastry layer is very flaky. It seems to be suited for a crumble - it is absolutely impossible to roll. I would think that you need to add cold water to it, to make it a little more flexible, but the recipe did not ask for it, so I did not have water, and could not roll out the pastry. I simply pressed it to the tin with the fingers. And then when I tried to remove it it cracked, in so many places, that it was absolutely impossible to glue them together. So I had to discard the pastry layer :-).
- Then the sponge was too soft to serve as a base. It also got stuck to the tin and was torn in the middle, but I just put the torn part back in and the moisture from the mousse glued it up. But overall, the sponge was not spongy enough to absorb all the mousse, but not hard enough to be a base. I would use more flour next time.
- The lychee layer tasted wonderful! Texture-wise, I would add a little more gelatin, and wait until it’s semi solid to pour it out (I poured it when it was still too liquid). In the original recipe, it was supposed to be a raspberry mousse, which probably would have tasted great too.
- The glaze was just as you would expect this type of glaze to be.
- This is a cook book of trial and error, this recipe certainly fits both the trial and the error categories :-).

To Recipe...

Saturday, March 27, 2010

Apple Rhubarb Clafoutis Crumble

Want something soft, crunchy, tart and sweet, that would be low calorie too? Try this Apple Rhubarb Clafoutis Crumble.
Source
Improvised
Taste 5 (out of 5)
Difficulty 2 (out of 5)
Ingredients
For the clafoutis
- 2/3 cup all-purpose flour (300 cal)
- 1/2 cup brown sugar (270 cal)
- 2 large eggs (140 cal)
- 2/3 cup low fat milk (80 cal)
- 1/2 tsp almond extract
For the fruit filling
- 3 medium apples (210 cal)
- 2 stalks rhubarb (20 cal)
- 1/2 cup orange juice (65 cal)
- 1 tbsp lemon juice
- 2 tbsp brown sugar (70 cal)
For the crumble
- 1/2 cup oats (120 cal)
- 1/4 cup all purpose flour (110 cal)
- 1 oz/ 30 g almonds, chopped (175 cal)
- 1 oz/ 30 g brown sugar (115 cal)
- 1 oz/ 30 g cold butter (215 cal)
Total 1890 cal, 12 servings, 160 cal/serving
Instructions
1. For the filling: chop the apples and the rhubarb into 1/4 inch cubes. In a medium sauce pan cook the fruit with the orange juice for about 10 minutes over low-medium heat stirring occasionally, until the fruit softens. Add 2 tbsp of brown sugar and mix well.
2. For the clafoutis batter: beat the eggs on high speed with an electric mixer for about 5 minutes until the eggs triple in volume. Add the remaining ingredients all at once and beat until all the flour is incorporated and the batter is smooth.
3. Preheat the oven to 375F. Grease a 9x7 inch baking sheet and spread the fruit evenly over the bottom. Pour the clafoutis mixture over the fruit. Bake for 10 minutes.
4. For the crumble: Mix all the ingredients using pastry cutter. If there are still lumps, crumble them with your fingers. Remove the baking sheet from the oven, sprinkle the crumble evenly on top of the batter and bake for 25 more minutes. Let cool slightly before serving.
Afterthoughts
- I’ve been thinking for a while about making an apple rhubarb crumble and about making clafoutis. It was really hard to choose between the two, so I combined them and it turned out pretty good, in terms of both the flavor and the structure. 
- In the calorie-saving spirit, the clafoutis layer has no butter at all - the fat comes only from the low fat milk and eggs. And the taste is great - I will not be adding butter to my clafoutis any more.

To Recipe...