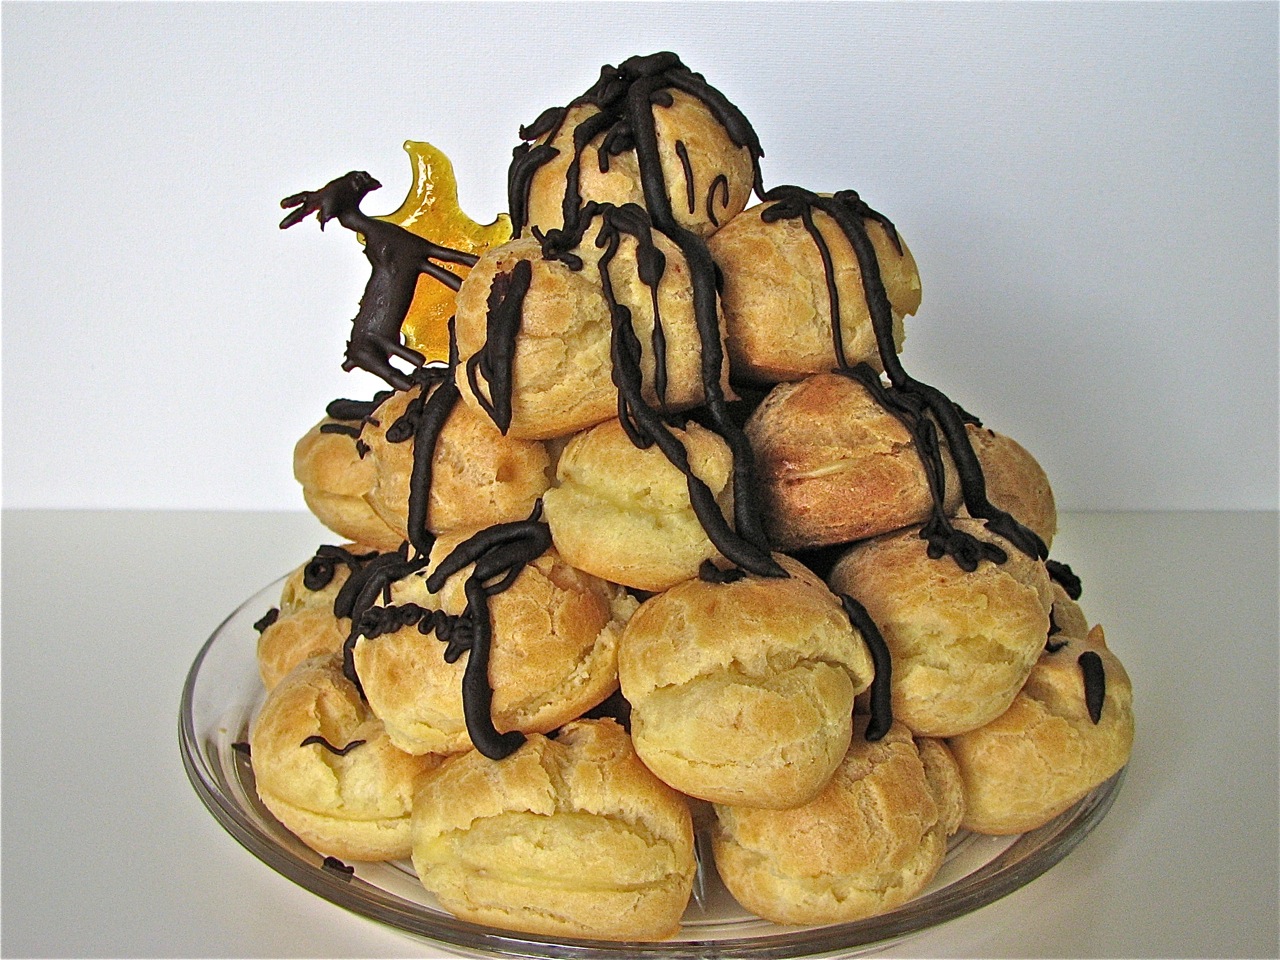
What can be better than a profiterole? A mountain of profiteroles...
Source
A combination of my mom’s recipe and the Daring Bakers May 2010 Challenge by Cat
Taste 5 (out of 5)
Difficulty 2 (out of 5)
Ingredients
For the choux pastry
- 3/4 cup / 175 ml water
- 6 tbsp / 85 g unsalted butter (610 cal)
- 1/4 tsp salt
- 1 tbsp sugar (45 cal)
- 1 cup / 125 g all-purpose flour (455 cal)
- 4 large eggs (280 cal)
- 6 tbsp / 85 g unsalted butter (610 cal)
- 1/4 tsp salt
- 1 tbsp sugar (45 cal)
- 1 cup / 125 g all-purpose flour (455 cal)
- 4 large eggs (280 cal)
For the cream
- 2/3 cup sugar (555 cal)
- 2/3 cup flour (300 cal)
- 2/3 liter milk (345 cal)
- 2 large eggs (140 cal)
Total 2730 cal, 30 profiteroles, 90 cal/profiterole
Instructions
For the pastry
1. Pre-heat oven to 425F. Line a large baking sheet with parchment paper or silicon mat.
2. Combine water, butter, salt and sugar in a saucepan over medium heat. Bring to a boil and stir occasionally. At boil, remove from heat and add the flour, stirring to combine completely.
3. Return to heat and cook, stirring constantly until the batter dries slightly and begins to pull away from the sides of the pan.
4. Transfer to a bowl and stir with a wooden spoon 1 minute to cool slightly.
5. Add the eggs. As you stir, the batter will become dry-looking like lightly buttered mashed potatoes. It will also be very sticky.
6. Transfer batter to a pastry bag fitted with a large open tip (I piped directly from the bag opening without a tip). Pipe choux about 1 inch-part in the baking sheets. Choux should be about 1 inch high and 1 inch wide. Using a clean finger dipped in hot water, gently press down on any tips that have formed on the top of choux when piping. You want them to retain their ball shape, but be smoothly curved on top.
6. Transfer batter to a pastry bag fitted with a large open tip (I piped directly from the bag opening without a tip). Pipe choux about 1 inch-part in the baking sheets. Choux should be about 1 inch high and 1 inch wide. Using a clean finger dipped in hot water, gently press down on any tips that have formed on the top of choux when piping. You want them to retain their ball shape, but be smoothly curved on top.
Alternatively, if you don’t have a piping bag, you can use 2 spoons to form the choux. Constantly dip the spoons into hot water to prevent the batter from sticking to them.
7. Bake the choux at 425F until well-puffed and turning lightly golden in color. This can take anywhere from 10 to 25 minutes so keep an eye on your choux. If you reduce the heat too soon the choux will sink and become soggy and wet (but it will still taste ok ;-) ).
7. Bake the choux at 425F until well-puffed and turning lightly golden in color. This can take anywhere from 10 to 25 minutes so keep an eye on your choux. If you reduce the heat too soon the choux will sink and become soggy and wet (but it will still taste ok ;-) ).
8. Lower the temperature to 350F and continue baking until well-colored and dry, about 20 minutes more. Remove to a rack and cool.
For the filling
9. Beat the eggs with the sugar and flour. Boil the milk. While the milk is warming, pour about 1/2 cup into the egg mix and stir well to gradually increase its temperature. This way the eggs won’t curdle when you add them to boiling milk. Repeat this step 2-3 more times as the milk approaches boiling temperature.
10. Once the milk boils, pour the warm egg mix into the boiling milk, constantly stirring, to prevent lumps from forming. Keep on the stove for several 3 more minutes, continue stirring. It’s best to use hand held mixer in this stage.
11. Remove the cream from heat, let cool.
Assembly
12. Cut the chilled choux in half with a sharp, dry knife. Scoop some of the cream with a spoon, fill the pastry and replace the upper half on top.
12. Cut the chilled choux in half with a sharp, dry knife. Scoop some of the cream with a spoon, fill the pastry and replace the upper half on top.
13. Assemble your piece montée and pour melted chocolate on top for decoration.
Afterthoughts
- I loved the final result - the only downside: it’s way too easy to finish all the mountain in one go :-). And since it’s a mountain, why not put a mountain goat on it (my boyfriend’s idea)?
- This is my second profiterole mountain this month. The first time I was experimenting with a chocolate - Irish cream filling. It was nice, especially after a night in the fridge, but I guess the classic cream is still my favorite.
- I used Cat’s recipe for the choux, and my mom’s recipe for the cream. It’s all about minimizing the butter - Cat’s choux has a little less of it, and my mom’s cream has no butter at all. In some cases removing the butter results in a pretty sad taste, but I really think my mom’s cream is the best one for profiteroles and Napoleons. The butter only adds calories and at best does not add any taste.
Blog-checking lines: The May 2010 Daring Bakers’ challenge was hosted by Cat of Little Miss Cupcake. Cat challenged everyone to make a piece montée, or croquembouche, based on recipes from Peter Kump’s Baking School in Manhattan and Nick Malgieri.