AdSense Full Screen test

Friday, April 30, 2010

Cocoa Coffee Pudding

The Daring Baker April 2010 challenge
Source
Taste 4 (out of 5)
Difficulty 2 (out of 5)
Ingredients
- 20 g margarine (145 cal)
- 20 g brown sugar (75 cal)
- 40 g all purpose flour (145 cal)
- 1/4 tsp baking powder
- 1 egg (70 cal)
- 1 tsp cocoa powder (10 cal)
- 1 tsp instant coffee 
- 2 tbsp water
- 1 tsp brandy (10 g)
- 1/2 tsp vanilla extract (5 cal)
Total 460 cal, 2 servings, 230 cal/serving
Instructions
1. Beat the margarine with the sugar, add the egg and continue beating. Add the flour and the baking powder and mix well. 
2. Heat the water slightly, dissolve the instant coffee and the cocoa powder, add the water and the vanilla extract and mix with the remaining ingredients.
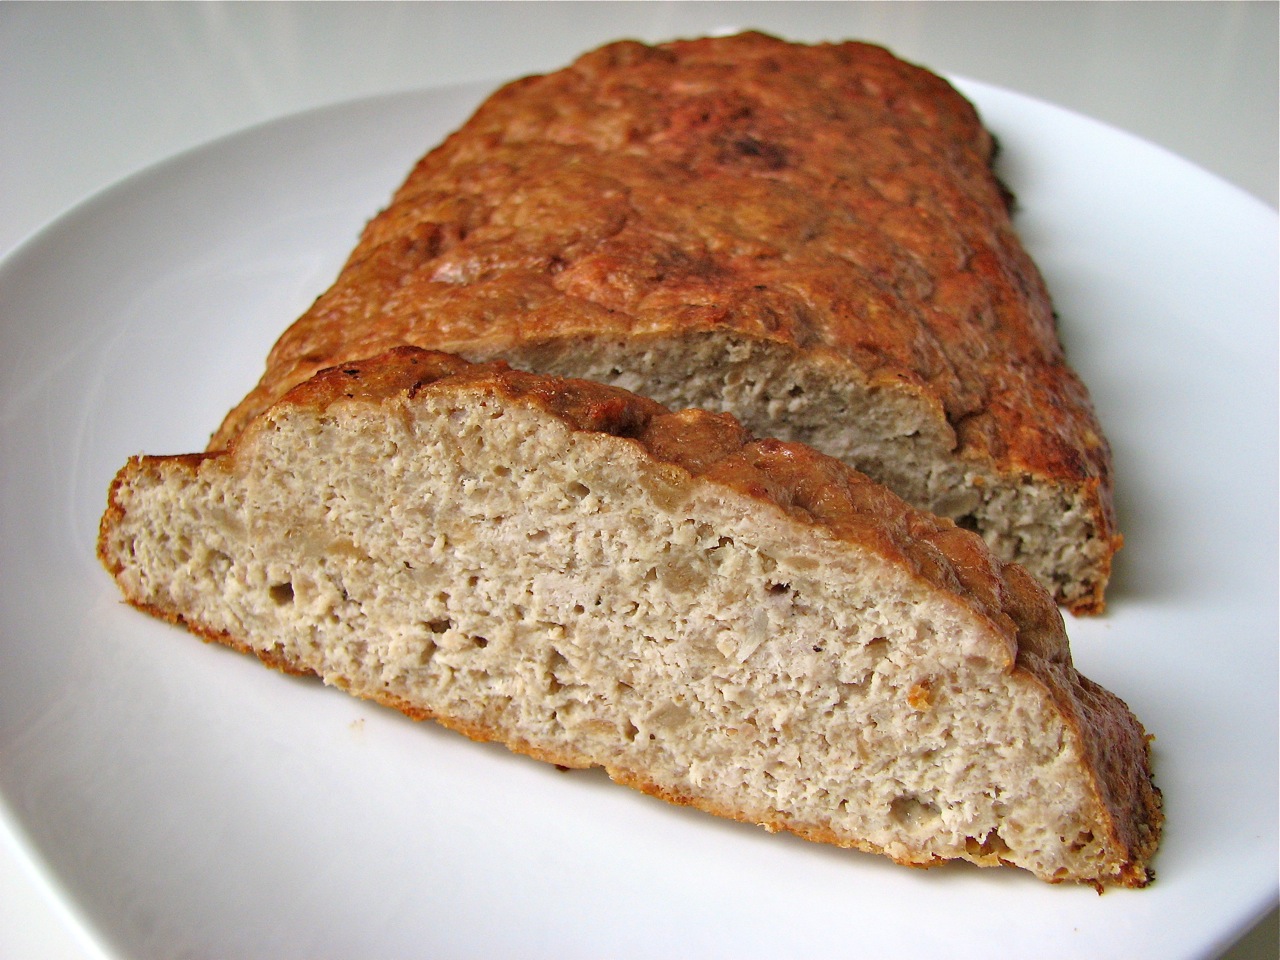
3. Grease a small (1.5 cups) pyrex dish. Pour the batter in and steam over low medium heat for about 40-45 minutes.
Afterthoughts
- I have to admit that I don’t like my current combination of coffee and cocoa, at least not in the existing proportions. However, the texture is so surprisingly soft and spongy that it makes up for the flavor. I am going to make a chocolate sauce to make up for the coffee :-).
- This is my first Daring Baker Challange, and when I saw the recipe, I have to admit I was somewhat disappointed - I was expecting fancy mouth watering cakes, and here I see a really simple dish, which in addition requires a lot of extra equipment that I don’t have (like a pudding dish and a steamer). So I was procrastinating for a long long time. But then on what I thought was the last day of the Challange (which was actually 3 days past the deadline) I finally made it. I decided to do without all the additional dishes, especially since I had no idea what to expect. So I used a very small (1.5 cups) Pyrex dish, and placed it over an inverted pie pan inside a large pot with water. And it turned out quite nice! It does not at all look fancy, but it tastes somewhat like those super soft Chinese or Japanese buns. I don’t know whether that’s the Traditional English pudding, but I liked it - must be great with a rich sauce. I’m buying a steamer next time I go to the Chinatown :-). Thanks, Esther, without your challenge I would have no idea that one can steam a pudding!

To Recipe...

Tuesday, April 27, 2010

Turkey Meatloaf

A really simple and quick recipe, perfect when you are too lazy to roll those small individual meatballs.
Source 
Taste 5 (out of 5)
Difficulty 1 (out of 5)
Ingredients
- 1 lb lean ground turkey (500 cal)
- 1/2 lb breadcrumbs (500 cal)
- 1/2 medium onion (30 cal)
- 2 garlic cloves (10 cal)
- 1 small canned tomato (10 cal)
- 1/4 cup milk (30 cal)
- 2 egg whites (30 cal)
- salt and black pepper to taste
- 1/2 cup tomato juice + 1/2 tsp sugar for brushing the top (20 cal)
Total 1130 cal, 6 servings, 190 cal/serving
Instructions
1. Peel the onion and the garlic and puree in a food processor with a canned tomato. 
2. Soak the breadcrumbs in milk for about 5 minutes (I made my own breadcrumbs from fresh bread in a food processor). 
3. Combine the meat, the breadcrumbs, the egg whites and the onion puree; season with salt and pepper and mix well .
4. Line a cookie sheet with aluminum foil, grease well and sprinkle with dried breadcrumbs. Form a free shaped meatloaf. Brush the top with tomato juice and sugar mix. Bake in an oven preheated to 400F for about 50 minutes to an hour. For glossier meatloaf, brush the top with the tomato juice-sugar mix 2-3 more times throughout baking. 
Afterthoughts
I usually make meatballs, but it’s so much more work. I recently watched a Martha Stewart DVD, where her mother was making a really nice meatloaf, so I was searching for a recipe on-line and found a little different version. I did not follow the recipe exactly - I wanted to use turkey and some other ingredients I had available, but I found this recipe very inspirational. My version turned out very tasty, I believe the original Martha’s recipe would too :-). 

To Recipe...

Sunday, April 25, 2010

Spinach Feta Bread

One more wonderful and delicious no knead bread.
Source 

Taste 5 (out of 5)
Difficulty 1 (out of 5)
Recipe available on-line here 

Afterthoughts
- Very very tasty! Great with Boursin or other creamy cheeses. And with soups, salads, sandwiches, and anything else you like.. Well, maybe not with jam or Nutella :-)
I often adjust the recipes a little, but this time I used exactly the same proportions as in the book. - My only modification: since I had to cook the spinach and since the recipe uses sugar, I first mixed the water with the sugar and the yeast so the yeast had activated by the time I added the other ingredients. This shortened the rising time of the dough from 2 hours to about 1 and a half. 

To Recipe...

Wednesday, April 21, 2010

Guacamole Bread

Avocado, tomato and garlic - for a guacamole bread.
Source 
Taste 3 (out of 5)
Difficulty 1 (out of 5)
Ingredients
- 3 3/4 cups all purpose flour (1705 cal)
- 3/4 tbsp yeast
- 1/2 tbsp salt
- 1 1/2 cups lukewarm water (temperature of about 90-100F)
- 1 garlic clove (5 cal)
- 1 ripe medium tomato (20 cal)
- 1/2 ripe avocado, pitted, peeled, and mashed (160 cal)
Total 1890 cal, 2 1-lb loaves, 945 cal/loaf
Instructions
1. Mince the roasted garlic. Wash and puree the tomato, do not discard seeds and peel. Pit, peel and mash the avocado. 
2. In a large container that has a lid, using a wooden spoon mix all the ingredients until all the flour is incorporated. Cover the container (not airtight) and let on the kitchen counter for about 2 hour until the dough approximately doubles in size. 
3. Use the dough after the 2 hour rest or refrigerate it in the same container still covered (not airtight). The refrigerated dough can be used over the next 5 days. 
4. On the baking day, sprinkle the dough with flour to prevent sticking and cut the desired amount. I use half of the dough at a time to make a 1-lb loaf. Gently form a ball by stretching the surface of the dough around to the bottom on all four sides, rotating the ball a quarter-turn as you go. If you want, you can also elongate the dough into an oval. Place the loaf on a cornmeal or semolina coated pizza peel. If you do not use a baking stone, place the bread on a cookie sheet which will be used for baking. Let the loaf rest for about 90 minutes (or 40 minutes if using non-refrigerated dough).
5. Place an empty broiler tray in the oven where it will not interfere with the rising of your bread.   About 30 minutes before baking preheat the oven with the broiler tray and the baking stone to 450F. If you do not use the stone, the preheat will be shorter.  
6. Right before baking slash the top of the loaf with a serrated knife. Slide the bread onto the stone, if using, or simply place the cookie sheet into the oven. Pour 1 cup of hot (not boiling) tap water into the broiler tray - be very careful here: the tray is hot and there will be a lot of steam.  Avoid splashing the water on the oven glass door (the glass might crack).
7. Close the oven door as soon as possible to trap the steam inside. Bake for about 40 minutes until the bread is nicely browned. Remove from the oven and let cool on a rack. 
Afterthoughts
- The original recipe used whole wheat flour, but I prefer white flour. 
- I have to admit that this is not my favorite bread flavor-vise. The texture is still great, just as any other artisan bread from this wonderful book. Spinach and Feta cheese is next on my to try list.

To Recipe...

Monday, April 19, 2010

Spinach Strawberry Salad

A yummy, healthy, refreshing salad, even for those who are not crazy about spinach.
Source 
Improvised
Taste 5 (out of 5)
Difficulty 1 (out of 5)
Ingredients
- 5 oz fresh spinach (35 cal)
- 1/2 mango (60 cal)
- 4 large strawberries (65 cal)
- 1/4 large red onion (15 cal)
- 4 walnuts, chopped (100 cal)
- 1/4 cup orange juice (20 cal)
- 1 tbsp balsamic vinegar (10 cal)
- 1 tsp agave nectar (15 cal)
- 1 tbsp olive oil (120 cal)
Total 450 cal, 2 large servings, 250 cal/serving
Instructions
1. Wash well the fruits and the vegetables. Peel and coarsely chop the onion and the mango, chop the strawberries. Add the walnuts and mix. 
2. Mix the orange juice, balsamic vinegar, agave nectar and olive oil and pour over the salad. Let the salad stand in the refrigerator for 1-2 hours before serving.
Afterthoughts
- I am not crazy about spinach, but this is one of the few recipes that make spinach edible and even quite tasty for me. And my boyfriend does not like the texture of onions, but I did not hear any complaints in this case.
- It’s a colorful, pretty salad, and is perfect for entertaining guests. Everyone will like it. 

To Recipe...

Wednesday, April 14, 2010

Brunswick Stew

A great recipe for a cosy family meal when it’s cold outside (and my first Daring Cook challenge)
Source 
April 2010 The Daring Cook Challenge
Adapted from Lee Bros. Southern Cookbook: Stories and Recipes for Southerners and Would-be Southerners
Taste 5 (out of 5)
Difficulty 3 (out of 5)
Ingredients
- 1 sausage (130 cal)
- 1/2 tsp sambal oelek (very spicy East Asian chilly paste)
- 2 tbsp canola oil (240 cal)
- 400 g / 14 oz stewing beef, cubed (860 cal)
- 400 g / 14 oz skinless, boneless, chicken thighs, cubed (475 cal)
- 1/2 tbsp sea salt for seasoning
- 2 cups chicken broth (20 cal)
- 1 bay leaf
- 1 celery stock (10 cal)
- 450 g / 1 lb potatoes (350 cal)
- 2 medium carrots (25 cal)
- 1 large onion (65 cal)
- 1 cup frozen corn kernels (135 cal)
- 1 1/2 cups cooked beans (365 cal)
- 2 cups / 6-7 whole peeled tomatoes, drained (140 cal)
- 2 tbsp red wine vinegar (5 cal)
- juice of 1 lemon
Total 2820, servings 6, 470 cal/ serving
Instructions
1. Very thinly slice the sausage. Heat 1 tablespoon of canola oil in a large skillet to medium-high heat and add the sliced sausage with 1/2 teaspoon of sambal oelek. Fry until the sausage is well done. Transfer into a small bowl and set aside to cool. Reserve the oil in the pan. 
2. Season the chicken and the meat with salt and black pepper to taste and brown in the pan on high heat for up to 5 minutes. Transfer the chicken into a large bowl. 
3. Add 1 cup of the chicken stock to the frying pan to deglaze it and simmer until it reduces in half. In the meantime peel and dice the potato and chop the celery. Puree the sausage in a blender to a uniform paste. Add the sausage puree to the reduced stock, add one more cup of stock and mix well. 
4. Pour half of the hot broth in a slow cooker then place the meat, arrange the potatoes and the celery on top. Pour the remaining stock over the vegetables. Add a bay leaf, close the lead and cook on high for 3 1/2 hours.
5. In the meantime, chop the onion and cook with 1 tbsp of oil over low heat for about 30 minutes until caramelized. Stir occasionally. When the onion is ready you can either puree it in a blender or leave it as is.  Chop the tomatoes. 
6. After 3 1/2 hours, take out the bay leaf from the stew. Add the onions, the beans and the corn. Stir them well to evenly distribute them in the stew. Spread the carrots and the tomatoes on top and cook for 1 1/2 hours more. 
7. Remove from the heat and add the vinegar and the lemon juice. Season to taste with sea salt, pepper, and Tabasco sauce if desired.
Afterthoughts
- It turned out really good, but I think it would been ready much faster and would have been even softer and juicier without the slow cooker. 
- This was my first daring cook challenge, which I enjoyed a lot. So thanks to the Daring Kitchen for the forum, to Wolf for the recipe and to Audax Artifex for all the slow cooker tips.

To Recipe...

Monday, April 12, 2010

Apple Grape Buns

It must be love, love, love.. That’s all I can say about this yummy fruity bread!
Source 
Variation on Apple Buns with Water Roux from the Scent of Spice blog
Taste 5 (out of 5)
Difficulty 1 (out of 5)
Ingredients
- 2 1/2 cups all purpose flour (1140 cal)
- 1/4 cup + 2 tbsp whole wheat bread flour (165 cal)
- 1/2 cup ground oats (160 cal)
- 2 medium apples (160 cal)
- 1/4 cup grapes (15 cal)
- 2 tbsp honey (130 cal)
- 1/4 cup maple syrup (210 cal)
- 2 tbsp apple vinegar (5 cal)
- 2 tbsp sunflower seeds (95 cal)
- 3/4 tbsp yeast
- 1/2 tbsp salt
- 1 cup water at 90-100F
Total 2080 cal, 16 buns, 130 cal / bun
Instructions
1. Wash the apples and the grapes, discard the seeds, do not peel. Finely chop the apples and the grapes and puree in a food processor. 
2. Prepare water roux: mix 2 tablespoons of whole wheat bread flour with 1/2 cup of water and cook over medium heat in a small  saucepan, stirring continuously, until the roux thickens to a paste, so that when you stir it you can see the bottom of the pan. Remove form the heat and let cool to room temperature. The roux is supposed to make the bred softer and keep it fresh longer.
3. In a large container that has a lid, using a wooden spoon mix all the ingredients until all the flour is incorporated. Cover the container (not airtight) and let on the kitchen counter for about 2 hour until the dough approximately doubles in size. 
4. Use the dough after the 3-4 hour rest or refrigerate it in the same container still covered (not airtight). The refrigerated dough can be used over the next 10 days. Usually the no knead bread takes about 2 hours to ferment, but in this cake all the fruit makes it a little harder on the yeast, so it takes much longer for the dough to double in size. So you can either increase the yeast or wait longer.
5. On the baking day, sprinkle the dough with flour to prevent sticking and cut the desired amount. I use half of the dough at a time to make 8 buns. Each bun should be a size of a large plum. Dust it with flour and gently form a ball by stretching the surface of the dough around to the bottom on all four sides, rotating the ball a quarter-turn as you go. Place the buns on a cornmeal or semolina coated pizza peel leaving 2 inches between the buns. If you do not use a baking stone, place the buns on a cookie sheet which will be used for baking. Let the buns rest for about 50 minutes (or 30 minutes if using non-refrigerated dough).
6. Place an empty broiler tray in the oven where it will not interfere with the rising of your buns.   About 30 minutes before baking preheat the oven with the broiler tray and the baking stone to 450F. If you do not use the stone, the preheat will be shorter.  
7. Right before baking you can brush the tops of the buns with an egg white wash made from 1 egg white lightly beaten with 1 tsp of sugar - this will make the buns shinier. Slide the buns onto the stone, if using or simply place the cookie sheet into the oven. Pour 1 cup of hot (not boiling) tap water into the broiler tray - be very careful here, the tray is hot there will be a lot of steam.  Avoid splashing the water on the oven glass door (the glass might crack).
8. Close the oven door as soon as possible to trap the steam inside. Bake for about 25 minutes until the buns are nicely browned. Remove from the oven and let cool on a rack. You can also brush the tops of the hot buns with soft butter for a glossy finish. 
Afterthoughts
Ever since I tried the Barley Apple Bread from the Healthy Bread in 5 Minutes a Day, I was in love with the amazing apple flavor. The original recipe turned out a little too rough for me, so I came up with the softer Apple Buns. They are my favorite comfort food at the moment. 
Yesterday I was on the way of mixing a new batch, when I saw the Soft Fluffy Japanese Style Sweet Rolls post, and the water roux in it caught my eye. So I tried adding it along with the grapes to the Apple Buns recipe. It did become much softer, don’t know if it’s the roux or larger amount of fruit, but it’s really really really good! The roux is also supposed to keep the bread fresh over time, but I guess I have to wait a couple of days to see how that works.  

To Recipe...

Sunday, April 11, 2010

Mango Ginger Lemonade and Weightlossophy Recap

A healthy tropical drink plus the wrap up of my Weightlossophy.
Ok, so this is the last day of my one week detox. The idea was to eat unprocessed foods avoiding gluten, lactose, alcohol, caffeine and meat. I do not feel any effect of this detox, but I lost 4 pounds. 2 will be back as soon as I have a “normal” meal, but even 2 pounds per week is pretty good, right? 
Also, this week I was posting my Weightlossophy tips, which I followed when I lost 55 pounds over 7 months last year. So here are the last general thoughts and the recap with links to all the previous tips. 
My must-have for weight loss
  I have been complaining about weight almost all my life, even when I was pretty skinny as a kid. I had many sporadic diets, after which I almost always gained even more weight. A standard story, really. 
  This time the primary difference was a very strong motivation and a deadline that came with that motivation. I really really wanted to lose weight and was ready to start the diet “right now.” The problem with many short term diets is that you tell yourself: I am starting a diet tomorrow, today is the last day of “normal” eating, so... let’s binge! And then when you’re dieting one day something goes wrong, someone brings a cake to the office and you eat 2 pieces, you feel that “today is ruined anyway, so let’s binge today and tomorrow back to the diet.” And so it goes on. The problem is that in one binge you can eat 3,000-5,000 or more calories. It will take a week to compensate for it. And by the end of the week you’ll be so demotivated that you’ll binge again. 
  Now I realize why such diets did not work for me. Because I “wished” I had lost weight, but not “wanted it badly enough” to commit. Don’t begin a serious long-term diet unless you are absolutely motivated, determined and committed. If you plan to start it “tomorrow” or “next Monday,” it would most likely only result in unnecessary suffering and additional weight.  
  It makes sense, does not it? Why fight so hard for something which is only in the “wistful thinking” category?  Just accept that for now you can live with your weight as it is and spend your energy on more crucial things. Don’t bother with diets unless it’s a top priority for you.  
  I suppose that would be my primary dieting tip :-). If you are motivated, than good luck! And I hope you find some of the tips that I published this week useful. I don’t claim that they would all necessarily work for you - everyone is different and needs a different diet that he can sustain. But even if one of these ideas might appeal to you or inspire you to make some improvements in your diet, I will be very happy. We’re all together in this “diet” thing :-).
  
Summary of my previously published Weightlossophy tips with links:
And now the healthy tropical drink to celebrate the end of my detox. Tomorrow I am making my favorite apple buns :-)
Mango Ginger Lemonade
Source 
Improvised
Taste 5 (out of 5)
Difficulty 1 (out of 5)
Ingredients
- 1/2 mango (65 cal)
- 1 lemon (15 cal)
- 1 thin slice of ginger
- 1 tbsp agave nectar (60 cal)
- zest of 1 lemon
- 3-4 ice cubes
Total 140 cal, 1 serving

Instructions
Reserve 1,2 lemon slices for decoration. Crush the remaining ingredients in a blender. Enjoy!
Afterthoughts
Pretty good :-)

To Recipe...

Saturday, April 10, 2010

Fruity Quinoa Salad and Weightlossophy tip #7: How to Get off a Plateau

This salad is super-simple, quick to make, healthy and sweetish - a nice way to start your weekend. And the tip on what to do when your weight loss plateaus.
This week I was publishing tips from my Weightlossophy thanks to which I lost 55 pounds over 7 months. Like anyone else, during that time I hit many plateaus, when no matter how good I was, the weight would not go down. Here are some things you might want to try to get your scale cooperate again.
How to get off a plateau
  A plateau is probably the most frustrating aspect of every diet. When your scale shows a steady progress, it is relatively easy to keep yourself motivated. But when you are doing everything right, and the weight just would not budge, you start thinking that things are not working and are much more likely to give up. How many diets were broken by these plateaus!
  I think that indeed when you hit a plateau, your body is asking for a change. But the change does not mean giving up the diet altogether. Make small adjustments: change the types of food you eat, the workout style, your daily routine, the time of your meals, your calories intake. In fact, the changes don’t necessarily mean eating less and working out more. Taking a short break from your workout and eating slightly more can also work wonders, as long as you are doing it controllably and for a certain period of time. 
  I was very often saved from my plateaus by trips. I just cannot go to a new place without trying the local cuisine - for me food is at least 50% of my cultural experience :-). I decided that my diet does not apply when I travel, so I ate beignets in New Orleans, coconuts in Hawaii and steaks in Omaha. I tried to eat controllably, but it did not always work. I would come back home after 4-5 days and discover that I gained 1-2 pounds. But they would be gone after a day or two of my standard diet. And by the end of the week I would lose even more and move off that plateau! 
  If you’re looking for a “scientific proof,” check out the graph in “How I lost 55 pounds” post. The grey areas stand for trips, where I did not track my calorie intake and burn. In many place the orange weight line flattens out before the trip and then drops much faster after. 

And now for the healthy recipe of the day.
Fruity Quinoa Salad
Source 
Improvised
Taste 4 (out of 5)
Difficulty 1 (out of 5)
Ingredients
- 1/4 cup quinoa (155 cal)
- 1/2 cup water
- juice of 1/4 orange (20 cal)
- 1/4 mango (30 cal)
- 4 strawberries (25 cal)
- 5 grapes (20 cal)
Total 250 cal, 1 serving
Instructions
1. Cook the quinoa with water and orange juice for about 20 minutes over medium heat until all the liquids are absorbed.
2. Chop half of the fruit and puree the rest for the dressing. 
3. Mix the cooked quinoa with the chopped fruit and pour the dressing over the salad. Serve warm or cold.
Afterthoughts
This is a detox recipe, so I tried to make the recipe as simple as possible, without adding any spices, sweeteners, etc. It might have been a little bland, but the dressing made a huge difference and it turned out a really nice dish. Not just for the detox.

To Recipe...

Friday, April 9, 2010

Eggplant Sub and Weightlossophy tip #6: Stick and Carrot

Eggplants have the same shape as baguettes of ciabattas. So why do we only use them as a sandwich filling and not instead of the bread? Check out this gluten free, low calories sub and one more Weightlossophy tip.
This is my spring detox week and along with my some light, healthy recipes I’m also posting the tips that helped me lose 55 pounds over 7 months last year. Today’s tip is harsh, but I think I might not have made it without it.

Stick and Carrot
  It is very common  for dieters to give themselves rewards for good performance: “when I get to 150 lb I will go shopping”, “when I get to 140 lb I am allowed a fancy dinner”, etc. Unfortunately, it did not work for me, because I would always put off the reward for later in order to binge today: “oh, I did not get there this week, no problem - I will get my fancy dinner next week”. 
  This time I had a clear deadline, to achieve which I had to lose at least 1 lb per week. So I decided that I needed both a reward and a punishment: if I lose a pound I get $x to waste on anything I want, if I don’t lose a pound I have to tear up and throw away an $x bill. x can be any amount that is painful enough to throw. By the way, throw means throw, not giving it to your friend or your favorite charity. There should be no justification, nothing to make you feel good about missing your target. Of course, the reward and the punishment can be anything: if I am good I will buy new jeans, if I am bad I will be doing dishes by hand all week. The main point is that the reward should be appealing and the punishment should be very detterring
  I know this tip does not sound good, but for me it made a huge difference - I have not missed the target even once. My “judgement day,” when I weighted myself to check for that lost pound, was Monday, and that was particularly effective because it prevented many weekend binges.
  Another argument that helped me accept this harsh punishment regiment was that so many
people pay tons of money weekly for private coaches, support groups, etc. So I thought: I would be “paying” only for weeks when I am bad, for good weeks I’ll be getting my rewards :-).
  Side-note: The weeks when I was traveling were exempt from my carrot and stick policy - I chose to enjoy my vacations.
And now the gluten-free detox recipe
Eggplant Sub
Source 
Improvised
Taste 4 (out of 5)
Difficulty 1 (out of 5)
Ingredients
- 1/2 eggplant (30 cal)
- 1 slice red onion (10 cal)
- 1 garlic clove (5 cal)
- 3 mushrooms (10 cal)
- 2 rings red bell pepper (5 cal)
- 2 slices tomato (5 cal)
- 1 tsp canola oil (40 cal)
- 1 lettuce leaf
- 1/2 cup chicken or vegetable stock or water (5 cal)
- chopped basil, salt and pepper to taste
Total 110 cal, 1 serving
Instructions
1. Slice the eggplant in half lengthwise. Sprinkle with a generous amount of salt and let stand for 20-30 minutes. Rinse the salt. 
2. Preheat a dry frying pan over medium high heat and cook the eggplants on it, occasionally stirring them to make sure they don’t stick to the pan. If they do, add a little stock or water. Cook for about 10 minutes on each side.
3. Mince the garlic, finely chop the mushrooms and the onion, and saute with 1 tsp of oil over medium heat for about 20 minutes, stirring. If needed add a little stock or water. Add the bell pepper, season with basil, salt and pepper and cook for 5 more minutes.
4. Place lettuce over one half of the eggplant, top the sauteed mushrooms and peppers, add the tomato slice and cover with the second eggplant half. Enjoy your sandwich!
Afterthoughts
I was not sure how the eggplants would turn out if fried without oil, and found them quite juicy. Of course, if you don’t count calories, feel free to use oil. I  bet it would also be great to grill them, but I ain’t got no grill :-(. 

To Recipe...

Thursday, April 8, 2010

Salad Bouquet and Weightlossophy tip #5: Spend time on Non-Eating Food-Related Activities

Celebrate the beauty and flavor of simple vegetables with a festive design. Plus the weight loss tip of the day.
Over the last two days I published the first 4 guiding principles that helped me lose 55 pounds over 7 months. This is my 5th Weightlossophy tip.

Spend time on non-eating food-related activities
  I am obsessed with food, have always been. I am one of those who remember places by the foods they ate there. A huge portion of my thoughts is dedicated to food, often even when I am actively doing something else. I suppose that’s just how I am and I have to accept it, especially since for me food is one of the greatest joys in life, and I don’t want to deprive myself of it. 
  But thinking about food does not necessarily have to lead to munching. You can direct all this food-addict energy into other food-related activities that will actually distract you from eating. Like planning what you are going to eat, looking up the recipes, doing grocery shopping, reading restaurant reviews and menus, cooking, counting calories (additional benefit of Tips #2), taking pictures of your food, and blogging about it (yes, yes - that’s one of the main reasons I started a food blog). 
  
  A perfect example of a non-eating food-related activity is the Salad Bouquet recipe below. Yesterday evening I spent at least half an hour thinking about the design. Today I spent another 30 minutes actually “building” it. Then at least 1 hour taking the pictures (we barely have any windows at home, so my only chance at natural light is on our small balcony in pretty ridiculous conditions ;-) ). And now finally writing this up. This gives you 2-3 hours happily dealing with food and consuming 0 calories. Not too bad, I think.
Salad Bouquet
Source 
Improvised
Taste 5 (out of 5)
Difficulty 2 (out of 5)
Ingredients
- 4,5 thin round slices + 1/2 tomato (10 cal)
- 4,5 thin round slices daikon radish (5 cal)
- 10-15 small lettuce leaves (10 cal)
- 2-3 twigs watercress
- 1-2 twigs parsley
- 1 medium bell pepper (30 cal)
- 1/2 mini cucumber (10 cal)
- 1 tbsp no-fat yogurt (10 cal)
- 1/2 tsp freshly squeezed lemon juice 
- 1/2 green onion
- salt and pepper to taste
Total 75 cal, 1 serving
Instructions
1. For the vase: Cut the top and the bottom of the bell pepper. Clean the remaining cylinder and fill with lettuce leaves, parsley and watercress twigs. 
2. For the flours: Place the thin round strips of daikon radish and tomato in a raw so that the overlap slightly and roll them all together to create a “rose”. For tomatoes it might be easier to use thin strips of tomato skins, especially for the finer “petals”. Place the roses inside the lettuce. With vegetable peeler cut thin slices of mini cucumber and arrange them “artistically” all around.
3. For the dressing: Peel 1/2 tomato, and blend together with the yogurt and the lemon juice. Add the finely chopped green onion and use the bell pepper tip (the one without the stem) to serve the dressing.

Afterthoughts
You can serve this salad as an individual dish, but it would probably fit better as a decoration for a large salad bowl on a dinner table. Of course, if you have a large salad, you can use one additional pepper to accommodate a larger amount of dressing.

To Recipe...